Showing posts with label crafting with recycled materials. Show all posts

Butterfly Tree {from recycled cardboad}

How cute is this tree full of butterflies?  Isn't it perfect for Spring?  Hard to believe this beautiful tree full of butterflies was once an ugly cardboard box in my recycling bin.


Want to make one?

First, draw an outline of a tree on a cardboard box, and cut it out.  (I used an X-Acto knife, but I am sure scissors would work too.)  Then, cut a rectangle out of the cardboard box, and using a slit in the triangle and a slit in the tree trunk, attach it to the bottom of the tree.  (This is how the tree stands up.)


Now for the fun part!  Have the kids make leaves and butterflies, and attach them to the tree. 

To make the butterflies, cut a rectangle out of tissue paper, and have the kids decorate the wings.  Scrunch it up in the middle and twist a pipe cleaner around the middle.  The ends of the pipe cleaner will become antennae.


The leaves are just squares of green tissue paper scrunched up.  We attached the leaves with double sided tape, and we attached the butterflies with mini clothespins.


I am so please with how it turned out.  I think we might even change the decorations with the change in seasons.  :-)  

♥ 
Gina Bell (aka East Coast Mommy)

* If you haven't already "liked" me on facebook, I would love to have you join me here

Toilet Roll Bunnies

At Christmas we made snowmen out of toilet paper rolls, so we decided to dig in our recycling bin again and make some adorable bunnies for Easter.  It was so much fun that we made a whole herd of toilet roll bunnies.


Aren't they cute?  Here is how easy they are to make:

1)  Paint the toilet rolls white and allow to dry completely.


2)  Cut ears and feet from cardstock (see shapes below).  You can also color the insides of the ears pink.


3)  Use white glue to add eyes and a nose.  Then, use a black marker to draw a mouth and whiskers.  (You could also draw in paws and bow tie.  Let the kids be creative.)


4)  Use white glue to secure the ears and the feet.


5)  Finish by adding a pom pom for a tail.  Cute, right?  :-)


Who doesn't love a simple holiday craft?

♥ 
Gina Bell (aka East Coast Mommy)

Easter Napkin Rings {made from paper towel tubes}

If you are hosting Easter dinner this year, you are going to love this little project... Easter napkin rings made from empty paper towel tubes. It's a wonderful way to get kids involved in Easter preparations.


Wouldn't your little one be proud to set the table with something they created?  Here is how easy they are to make:

First, cut paper toilet paper tube into 1 ½” rings, and have the kids paint them. 


Then, decorate with any embellishments you choose.  We used stickers from the dollar store to keep things simple.


To finish, cover the rings with Modge Podge or glue.  (This will make them stiff and keep the stickers in place.) 

Add an Easter napkin and you are ready for guests! 

♥ 
Gina Bell (aka East Coast Mommy)
** If you haven't already "liked" me on facebook, I would love to have you join me here.

Recycled Crayon Valentines

I am always love cute, easy and inexpensive gifts the boys can give to their little friends.  This year, my four year old is bringing these adorable heart-shaped crayon Valentines to his Preschool pals.


Cute, right?


Want to make some?  Dig out your old broken crayons, and follow these simple instructions.

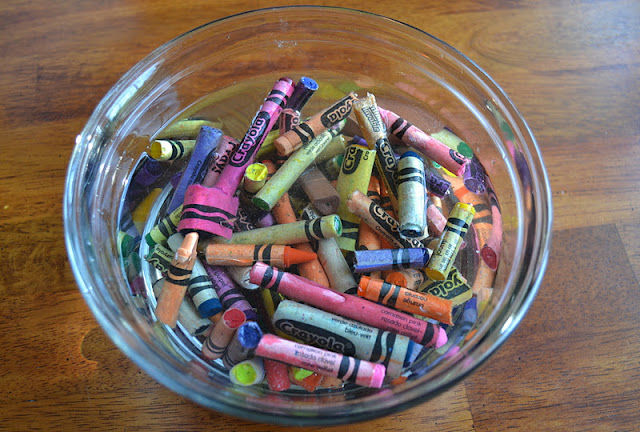
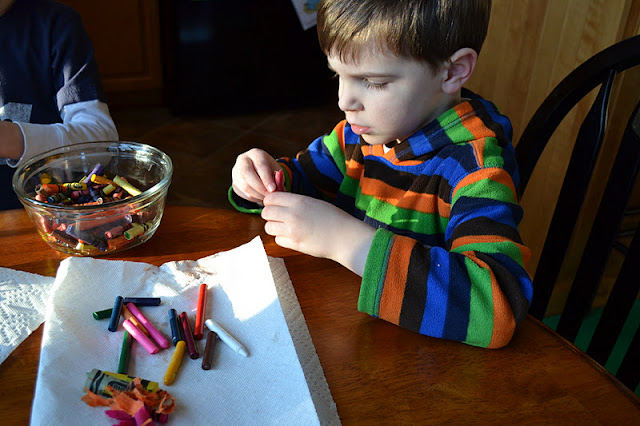
Step 1 - Soak the crayons in water, and put the kids to work peeling the paper off the crayons.


Step 2 - Break up the crayons and put them in a heart-shaped muffin tin.  I found this silicon one at the dollar store.  (Don't forget to put the flimsy silicon muffin tin on a proper cookie sheet before you pop it into the oven.)


Step 3 - Melt the crayons in the oven.  (I set my oven to 300 degrees, and it took about 10 minutes for all the crayon bits to turn to liquid.) 

Step 4 - Carefully remove the tray from the oven, and let the crayons cool completely.  (I put mine outside to speed up the cooling process.)


Once you "pop" the crayons out of the tin, they are ready to give out.  I attached ours to cards (which I printed on my computer) that read, "I having a friend like YOU!", but you can package them any way you like.


Much better than a bin of broken crayons, don't you think? 

Happy Valentine's Day!


Gina Bell
 (aka East Coast Mommy)


Don't miss out on any of the fun... follow me on social media here.


If you are looking for more Valentine's Day inspiration, check out more than 30 Valentine's Day ideas here.

Babyfood Jar Tealight Holders

These cute tealight holders are fun to make with the kids, and they use supplies right out of your recycling bin -- empty baby food jars.  My boys loved this activity because it is a little messy and involves using scissors and glue.  :-)


First, gather your supplies:  empty babyfood jars, tissue paper, a paintbrush, and glue.  (You'll need to thin out the glue to the consistency of paint -- approximately 3 tbsp glue for each 1 tbsp water.)


Then, follow these three simple steps:

Step 1:  Using the paintbrush, apply glue to a small section of the babyfood jar.


Step 2:  Cut tiny pieces of tissue paper, and apply to the area where you have just applied the glue.  (Keep applying glue and tissue paper until the entire jar is covered.)


Step 3:  Wait for the glue to dry, and then apply a coat over the top of the tissue paper.  (You can add a second top-coat if desired.)


That's it!  You can use a glue gun to attach a piece of ribbon or other embellishments, but this is totally optional.  

Remember to never leave a burning candle unattended... especially around children.  I intend to use some battery operated tealights I found at the dollar store.  Better safe than sorry!

♥ 
Gina Bell (aka East Coast Mommy)

Toilet Paper Roll Snowman

Who doesn't love a good toilet roll craft?  And this toilet roll snowman is totally adorable and perfect for a cold winter day.


To make your own, here's what you do:

1)  Paint the toilet paper roll with white paint, and allow it to dry completely.


2)  Glue on two "googly eyes" and a nose cut from orange craft foam or construction paper.


3)  Make a hat out of an old baby sock in three easy steps.  (per pictures below)  a)  Cut off the top of the sock.  b)  Pull the sock onto the top of the toilet paper roll.  c)  Twist an elastic onto the top of the hat.


4)  Use a black marker to draw a mouth.


5)  Tie on a scarf made of felt, and you're done!


"Snow" fun... and no mittens required!  :-)

♥ 
Gina Bell (aka East Coast Mommy)

Milk Carton Bird Houses

We had so much fun making bird feeders (a few weeks ago), we decided to make some houses for our feathered friends out of old milk cartons.  Don't you just love rescuing stuff from your recycling bin and turning it into a great project?


This project is sooooooooo easy.  (I didn't even paint the birdhouses because I didn't want the paint washing off when I put them outside.

Here's how you can make one:

1)  Cut a hole {door} at the bottom of the container.


2)  Cut a slit in the back of the milk carton, and poke a stir stick through {to be used as a perch}.  Secure with tape.


3)  Cut two small holes at the top (one on each side) of the milk carton, and thread a pipe cleaner through.  Wrap the ends together at the top.


4)  Put some peanut butter and bird seed inside the house.  My boys loved this part... it's the messy part.  :-)


That's it!  Hang it on a tree branch, and wait for the birds to come.


Happy Bird Watching!

♥ 
Gina Bell (aka East Coast Mommy)

Gift Tags from Recycled Cardboard

Looking for a use for all the cardboard boxes you have sitting in your recycling bin?  Why not make some cute gift tags?


Here is a tutorial for a charming Christmas tag {and I have also included a template for an adorable Birthday tag}.

You'll need:  a cardboard box (like a cereal box or granola bar box), yarn or ribbon, scraps of paper in different colors/patterns, scissors, and glue.

 Here's what you need to do:

1)  Use the templates found here to cut two gift tag shapes -- one from the decorative paper and one from the cardboard.  Also, cut out the tree shape in a contrasting paper color.


2)  Glue the decorative paper to the colorful side of the cardboard (so that the blank side of the cardboard is on the back of the tag)  Then, glue the tree to the top of the decorative paper.


3)  Punch a hole at the top of the tag, and loop a piece of thread or ribbon through the hole.


Easy, cute, and made with stuff you have lying around the house.  Use your imagination to decorate the tags any way you want... and let the kids try too.  The tree and cupcake templates are just to get you started.  :-)


Gina (aka East Coast Mommy)

Recycled Matching Game

Do you ever wonder what to do with all those milk/water jug caps?  I have a bunch of them in my "stuff to recycle into crafts" box.  I thought it would be fun to make a matching game for my boys.  It was so easy, fun, and absolutely free.


Here's how we did it:

1)  We decided to do a matching game with numbers from 1-10, so we counted out 20 bottle caps.  (You can do it for letters, colors, people in your family... whatever you want.)


2)  We traced 20 circles onto a piece of paper, and my four year old printed the numbers in each circle.


3)  I cut out all the circles (just inside the lines I had drawn) and put them in the caps.  You don't even need to use glue because the grooves in the lid keep the paper in place.  Easy, right?  :-)


That's it!

To play the game, simply flip over all the lids, and take turns trying to make matches.  If you get a match, you get another turn.  When all the lids are gone, the person who made the most matches wins.


Happy Matching!

♥ 
Gina Bell (aka East Coast Mommy)

Don't miss any of the fun....