10 Punny Father's Day Gifts

Who doesn't love a good "Dad Joke"? So, when it comes to Father's Day, "punny gifts" are perfect. Today, I'm sharing 10 punny Father's Day gift ideas that are sure to make the special dad in your life smile.


1) Soda – Let dad sit and relax with an ice-cold soda. Gift him a six pack of his favourite beverage, and add “tie” tags that say “World’s Greatest POP!”. Download the "tie tags" I designed here.


2) Donuts – A bouquet of flowers might not be a dad’s favourite gift, but who wouldn’t love a bouquet of donuts? Grab a box of Timbits, add them to the end of BBQ skewers, gather the bottoms together with an elastic, wrap the bunch up in tissue paper, and secure it all together with a piece of ribbon. Then, to make the gift extra fun, add a tag that says, “I DONUT know what we would do without you!”. Check out the step-by-step instructions for putting together a donut bouquet here.


3) Socks – For a whimsical gift option, consider picking out a pair of socks with a design that fits his personality. Then, add a punny tag that says, “You knock my SOCKS off!”


4) Cookie Kit – Dads that like to bake (and eat) cookies will love receiving a homemade cookie kit for Father’s Day. In a mason jar, assemble all the dry ingredients required to make their favourite cookies. Then, attach a tag that says, “Dad’s emergency ‘STACHE of cookies!” Get my favourite cookie mix recipe, and Download the tags I designed for you here.


5) Painted Rock – Handmade gifts are always appreciated—especially when they are made by children. A child can paint a rock with a punny twist by using paint markers to add the words, “My Dad ROCKS!”


6) Reese’s Pieces – For a father with a sweet tooth, a box of his favourite candy makes a great gift. Reese’s Pieces are perfect when paired with a “We love you to PIECES!” tag. Download your tags for FREE here.


7) Gift Cards – Gift cards are great, but they can often feel impersonal. This problem can be solved if you package it in a creative way. Insert the gift card into the centre of roll of toilet paper. Then, add a tag that says, “Thanks for putting up with my CRAP.” Funny, right? Download the tags I designed (for free) here.


8) S’more Kit – The weather is getting warmer, and campfires are a summer staple for many families. It is the perfect time to wrap up a s’more kit for dad and add a note that says, “I couldn’t love you S’MORE!” Download the tags I designed here.


9) Movie Night – Time together is the best gift of all, and a movie night is fun and easy to play. Try to include a pun or two to make Dad smile. For example, for a viewing of Star Wars, you can make a sign that says, “YODA best Dad!” Don’t forget to serve “You’re the best POP in the world!” popcorn.


10) BBQ – Planning a special BBQ for Father’s Day is a fantastic idea. Gather up all dad’s favourite grilling staples, put them in a basket, and add a tag that says, “Time for a BBQ. It will be GRATE!”


What are you planning to spoil your special guy with this year? I hope you have a very happy Father's Day!


Gina
 (aka East Coast Mommy)


You might also enjoy these ideas...


"World's Greatest POP" Father's Day Gift... with free printable tags

Dad jokes are the best! So, a "punny" Father's Day gift is perfect for the occasion. I love this adorable "World's Greatest POP" DIY gift, and you can download the tags FOR FREE below.


You'll need: pop, the free printable tags (below), and twine.


To download the free printable tags: click on the photo below, right-click, save it to your computer, and print like a regular 8x10 photo.


Then, just punch a hole in the tie tag, insert a piece of twine, and attach it to a bottle.


Soooo easy, and super cute, don't you think???


Take a closer look at this gift idea (and 9 more) here...


Does the special guy in your life like a pun? I know I appreciate a good dad joke! :-)


Gina
 (aka East Coast Mommy)


Find MORE fantastic Father's Day ideas here.

10 AMAZING dollar store finds, hacks and diys for SUMMER

I love summer, and living well on a budget, don't you??? If you answered "yes" you are going to really enjoy this post and video. Today, I'm sharing 10 AMAZING dollar store finds, hacks and diys for SUMMER.


1) DIY Solar-Powered Lamp - I love this cute little lamp, and it's perfect for summer patios. It's also super-easy to make with a few cheap supplies from the dollar store. Find the step-by-step instructions here.


2) Summer entertaining hack - Dishes from the dollar store are perfect for summer entertaining. They are cheap... but they don't need to look it! Pop a margarita glass in the center of a bowl for an impressive way to serve chips and dip. Get a closer look here.


3) Hack for keeping food cold when entertaining this summer - Add water to the bottom of a dollar store bowl, freeze it, and insert a second (identical) bowl on top. Fill it with food, and your good to go! See a visual demonstration here.


4) DIY First Aid Kit - Summer adventures are often accompanied with bumps and bruises, so having basic first aid items ready at all times is advisable. I love grabbing a plastic container at the dollar store and filling it with supplies. I also use duct tape to add a cross to the top to make it recognizable. Find out more here.


5) Water Fight Supplies - The dollar store has everything you need for summer water fights. I love these balloons, but for a more environmentally option, consider cutting sponges into strips and securing the centres together with an elastic. Then, you can dip the sponge balls in water and throw. Both options are perfect on a hot summer day!


6) Wipes - Baby wipes are perfect to have on hand during summer. They are perfect for picnics and for wiping sticky fingers when kids are eating s'mores.


7) Wasp deterent - I've bought these paper wasp nests at the dollar store for years, and I swear they work. I have no idea what crazy science makes these effective, but I'm a believer!


8) Cupcake wrappers - Everyone has cupcake wrappers for making cupcakes and muffins, but they have other uses too. Poke a hole in the middle, pop in a straw, and use them to keep flies out of summer drinks. They also work for catching popsicle stick drips.


9) Custom roasting sticks - Campfires are made for roasting, and these customized sticks are inexpensive and easy to make. Find the "how to" instructions here.


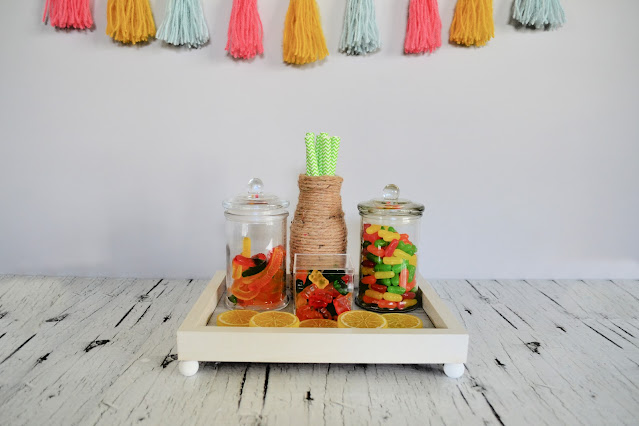
10) Candy tray - I love a simple, summer candy tray. I made this one from a dollar store picture frame, and you can find the "how to" here.


For a closer look at all 10 AMAZING dollar store finds, hacks, and diys for SUMMER, check out the video below.


Let me know in the comments if you have a favourite summer HACK. I love learning new things!


Gina Bell
 (aka East Coast Mommy)

Clothing to take you from the RINK to the LINKS

 *sponsored post*

Every Spring I realize how much my boys have grown, and I search for new clothes to fill their drawers. My boys love hockey and golf, so they are huge fans of Gongshow Gear clothing. Today, I'm sharing my boys favourites from the new Spring/Summer line. These options are perfect for the rink and the links.


Each of my boys has his own personality and style, so of course they selected different items.

My oldest is pretty confident with clothing colours, so he picked a pretty bold shirt. How fun is this tie game on polo ? The colours are fantastic. He paired them with the absolute bomb shorts (which are also high quality, stylish and comfy).


My middle son is less adventurous with colour, and his number one priority is always comfort. He's loving the in the 90s polo and the tee one up hat he chose. Perfect for the golf course!


My youngest is a goalie, and he has really strong opinions on what he wears. Goalies are a unique breed! lol

He chose the protect the tarp t-shirt and the Always Hockey hat (which he loves to wear backwards). Here he is heading to the rink for Spring hockey.


My boys are loving all their new clothes -- the perfect combination of quality, comfort, and style. Have you checked out the new Gongshow Gear line yet? Do you have a favourite? Let me know in the comments below.


Gina Bell
 (aka East Coast Mommy)


*Disclosure - I was given GONGSHOW products for free in exchange for my honest review and promotion of the products. As always, the views expressed on this blog are 100% my own... and my boys genuinely loved everything they received.

Unique and Budget-friendly DIY Graduation Candy Bar... with free signage and tags

I love a good party DIY... and what's better than a DIY Candy Bar. Today, I'm sharing my tips and tricks for putting together a fantastic candy bar on a budget. I'm even including FREE printable signage and tags.


Take a peek at the video (below) for all the information you need to put together your own impressive and budget-friendly candy bar. Then, come back here and download the free signage and tags.


To download this sign I designed: click on the picture below, right-click, save it to your computer, and print it like a regular 5x7 photo.


To download this sign I designed: click on the picture below, right-click, save it to your computer, and print it like a regular 5x7 photo.


To download this sign I designed: click on the picture below, right-click, save it to your computer, and print it like a regular 8x10 photo.


To download this sign I designed: click on the picture below, right-click, save it to your computer, and print it like a regular 8x10 photo.


To download the tags I designed: click on the pictures below, right-click, save them to your computer, and print it like a regular 4x6 photos.


4 NEW Graduation DIYs... made using dollar store supplies

If you want to take your graduation celebration to the next level, you are going to want to pay attention to a few unique and memorable details. Today, I'm sharing 4 NEW graduation DIYs that are awesome, easy, inexpensive and fun! (And make sure to check out the video at the end of this post for all the step-by-step instructions.)


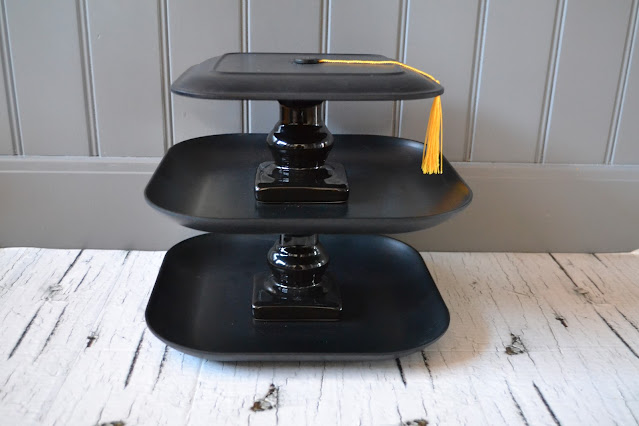
This tiered tray could not be easier to make, and it is perfect for a graduation. And no one will ever know it's made from dollar store plates and candle holders. Find the step by step instructions here.


Isn't this the perfect tray for a dessert table? I might even add a "You're a smart cookie" sign beside it. I love a good pun! 😀


Capturing memories through photos is an important part of any milestone celebration. I love the idea of creating a custom hashtag for guests to use on social media. Make sharing easy with this FREE downloadable sign. Grab your here.


Another fun photo idea is creating a simple "selfie frame". This one is made from a dollar store piece of foam core and dollar store stickers. It's easy, inexpensive, and fun! Find the instructions here.


And check out my handsome graduate...


Displaying photo memories is another wonderful idea. I glued dollar store frames together to make this awesome centrepiece. You can fill it with balloons or flowers. It's also fun to add a "Congratulations" cake topper. Check out the adorable pictures of my graduate below... and see the step-by-step instructions here.


Inspired to create one or more of these graduation DIYs? Check out the step-by-step instructions in the video below...


Do you have a graduation to plan? Are you planning to try any of these graduation DIYS? I think these ideas are perfect for a preschool, junior high, high school, college, or university graduation.


Gina Bell
 (aka East Coast Mommy)

Chocolate, peanut butter CAKE MIX cookies

Who doesn't love a good cookie... and a good short cut? These CAKE MIX cookies are perfect for when you have a chocolate craving, but don't have a lot of time. You can mix up a batch (in one bowl) in less than five minutes. It doesn't get much easier!


To make chocolate, peanut butter cake mix cookies, preheat the oven to 350 degrees. Then, in a large bowl, mix together the following:

1 box of cake mix
1 tsp baking powder
1 tsp vanilla
2 eggs
1/4 vegetable oil
1/3 cup chocolate chips
1/3 cup peanut butter chips

Mix together, and then scoop 1 tbsp balls onto a silpat (or parchment paper) lined cookie sheet. I like to use a cookie scoop.

Note: If you find the dough too sticky, you can refrigerate it, or add 1-2 tbsp of flour.

Bake at 350 degrees for 8-12 minutes. Don't overbake. They should be cooked, but still soft in the middle.

For a closer look at how easy it is to make these cookies, take a look at the video I made.


I hope you enjoy these cookies. Let me know in the comments if you are a fan of combining chocolate and peanut butter.

♥ 
Gina Bell (aka East Coast Mommy)

Don't miss any of the fun....