I love budget-friendly seasonal / holiday decor, and today I have some fantastic dollar store finds and DIYs for Fall and Halloween. A few of the pieces are multi-functional... and they are all easy, inexpensive, and super cute. I even created a YouTube video that will allow you to get a closer look at everything!
1) Multi use Book Stack - I found this faux book stack at the dollar store, and I knew I could easily make it a reversable version that would work for Fall AND Halloween.
I covered the existing words with a couple of coats of white chalk paint, and then I added the words "farm fresh pumpkins" that I printed on my Cricut. I added a bit of twine and a yarn pom pom pumpkin. Cute, right?
Then, I flipped around the book stack and added the words "spells and potions", which I cut out with my Cricut. I finished by sliding the twine to the opposite side, and adding a dollar store LED light.
2) Pumpkin with a gold stem - I love all the different styles of pumpkins that you can buy at the dollar store, but the one with the gold stem really caught my eye.
I also thought it would fun to give the orange pumpkin a "glam" Halloween makeover. I painted it with black paint from the dollar store (2 coats). Then, I used dollar store metallic gold paint to add polka dots. Didn't it turn out great?
It looks super-cute with the irridescent vase (from the dollar store) and a print I designed in a dollar store vase. You can download a FREE copy of the "Hello Pumpkin" printhere.
3) Simple seasonal soap - I think this idea is genius. Peel the label from a dollar store soap dispenser, and add a seasonal window cling. It's simple, but looks great!
4) Seasonal candles - Window clings can also add a seasonal flair to candles... in just a few seconds.
They stick easily to most surfaces, but you could use a bit of glue if you want them extra secure.
5) Inexpensive wall hangings - You can also make inexpensive wall hangings with dollar store window clings and stickers.
6) Front door wreath - I made this adorable floral decor for my front door using a dollar store bucket and dollar store sunflowers.
I used my Cricut to apply a design to the front of the bucket, I inserted a piece of floral foam, and I added the flowers (one at a time). I absolutely LOVE how it turned out... and it's easy to switch out the flowers for various seasons.
For a closer look at all these dollar store finds and DIYs, check out the YouTube video below.
Which of these projects is your favourite? I think mine is the book stack because it can be used for Fall AND Halloween. I love anytime I can save money, time, and storage space.
I love designing seasonal prints, and I just finished creating an adorable Halloween watercolour. It looks fantastic in a dollar store frame or attached to a dollar store clipboard, and you can download your copy for free below.
To download your copy:click on the photo below, right-click, save it to your computer, and print it like a regular 8x10 photo.
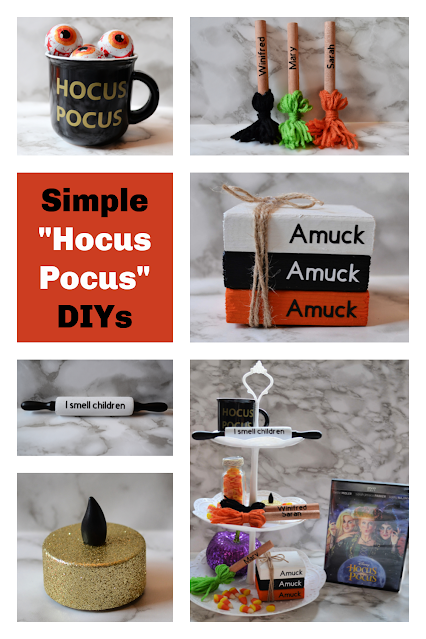
I love decorating a tiered tray for each holiday, and Halloween is no exception. It's the perfect time for a few easy and inexpensive DIY projects. This year, I decided to spend an afternoon decorating my tiered tray with a "Hocus Pocus" theme. Check out the simple Hocus Pocus DIYs below.
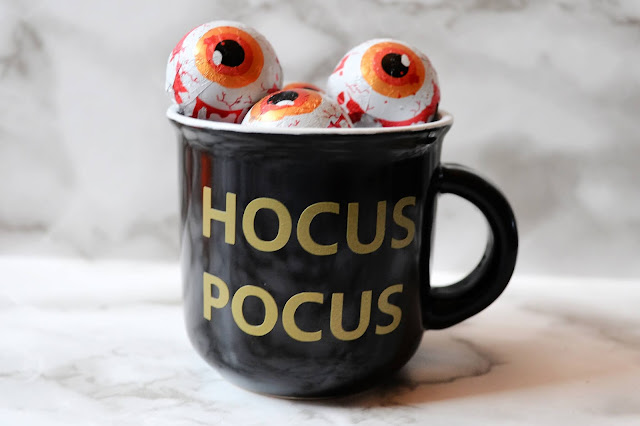
1) Hocus Pocus Mug - I found a tiny black expresso mug at the dollar store and used my cricut to write "Hocus Pocus" on the outside. If you don't have a cricut, you could use a dollar store glass marker or alphabet stickers.
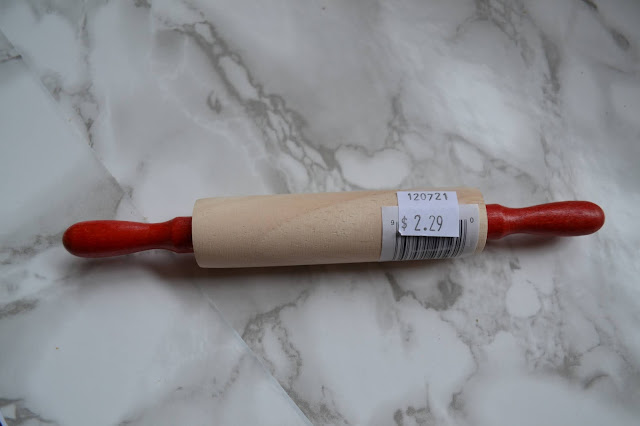
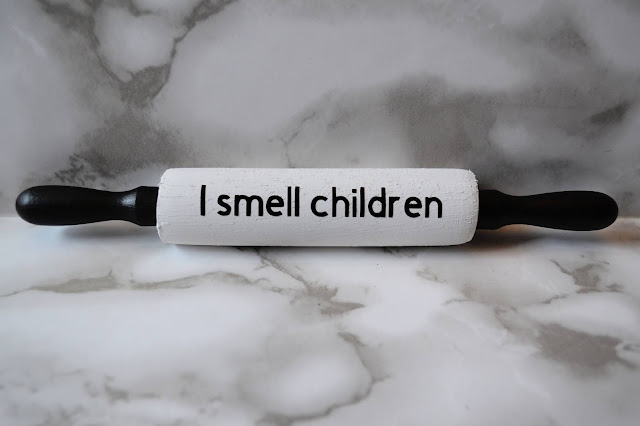
2) "I Smell Children" Rolling Pin - I found a toy rolling pin, and I painted the ends black and the main part white (using dollar store craft paint). Then, I added the words "I smell children" with my cricut. You could also use alphabet stickers or a sharpie.
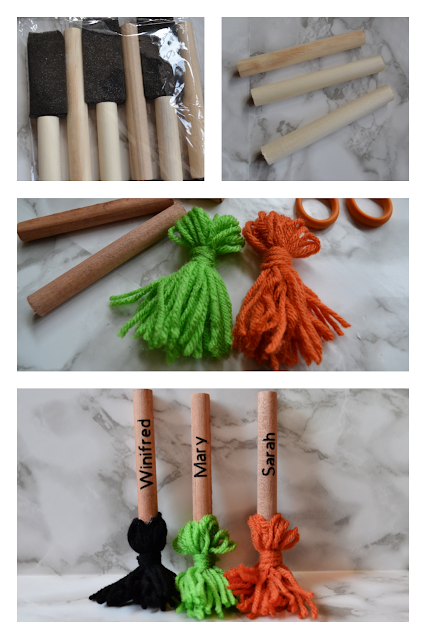
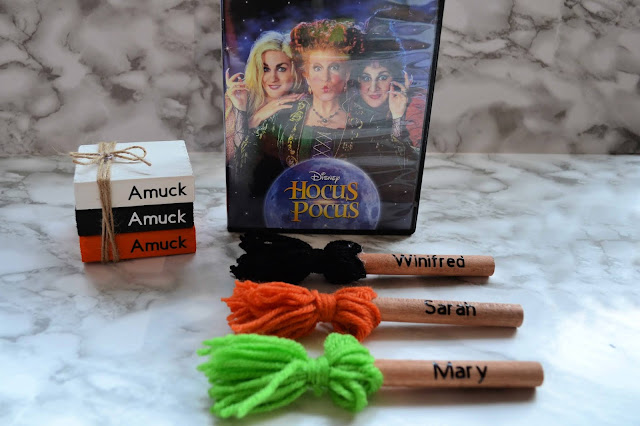
3) The 3 Sisters' Brooms - I am absolutely in love with these little brooms, and they are really EASY to make. For each broom, I started with a foam paint brush from the dollar, and I ripped off the foam. Then, I wrapped yarn around my hand 20 times, tied a piece of yarn 3/4 of the way down, wrapped the yarn around a few times, tied it again, and cut the loops at the bottom to make a tassel. I finished by using hot glue to attach the tassel to the paint brush handle. (If you have never made a tassel before, you should watch the video I made here.)
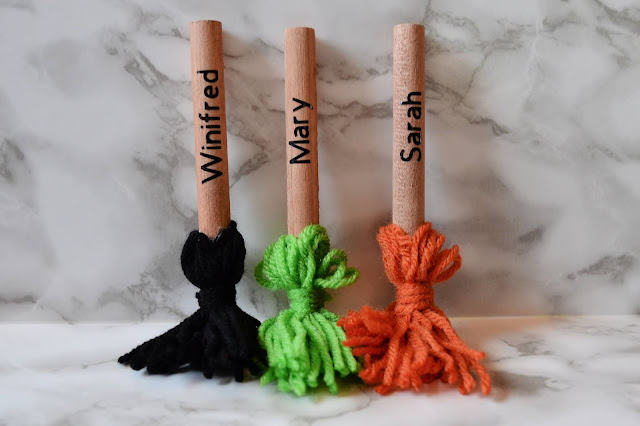
I made three different brooms, and I added the names of the sisters from Hocus Pocus to the brooms with my cricut, but you could also use a sharpie or alphabet stickers.
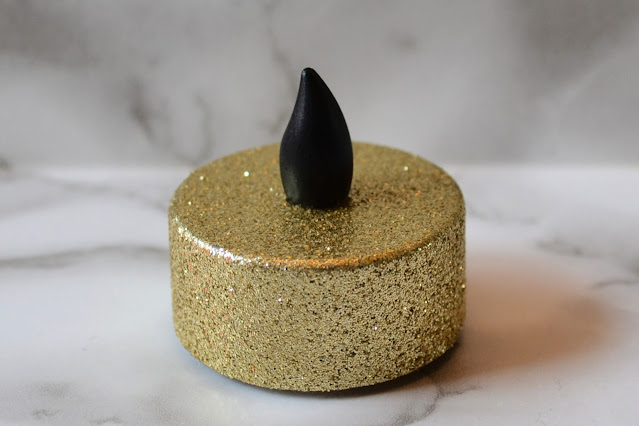
4) "The Black Flame" candle - This was the easiest DIY ever. I took a glittery dollar store (battery operated) candle, and used black craft paint to paint the flame. Easy peasy!
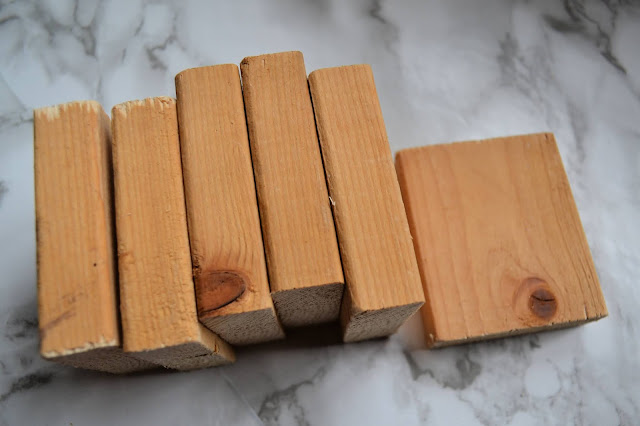
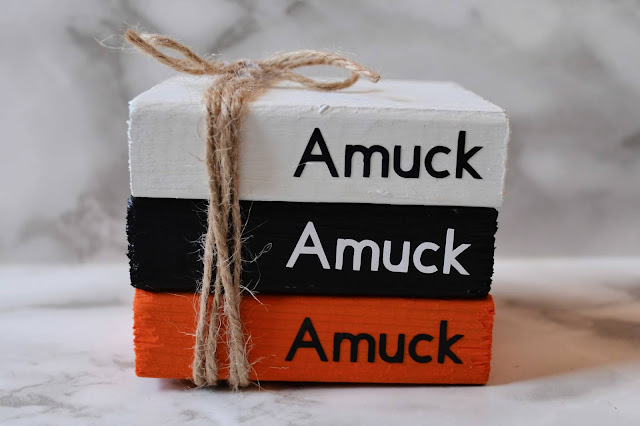
5) Scrap Wood Bookstack - I love book stacks on tiered trays, and I made this "Hocus Pocus" version using three equal sized blocks cut from a scrap piece of wood. I painted one piece white, one black, and one orange. Then, I added the words "Amuck Amuck Amuck" using my cricut (but you could use stickers, a sharpie, or a paint pen).
Then, I stacked the wood pieces, wrapped a piece of twine around the books, and secured the twine with hot glue. I think they are my favourite item on my tray. They are tiny and adorable!
Aside from the items I crafted for my tray, I filled in the blank spaces with a few dollar store trinkets. What do you think about my DIY Hocus Pocus tiered tray?
I also made a little video detailing how to craft all the items on my tiered tray. You can watch the "how to" video here.
It looks adorable on my hall table, and I think it would be great decoration for a Halloween movie night. Don't you?
Don't you love an easy and inexpensive way to add some fun decor to your home? I have the cutest FREE Halloween print for you today. I designed this simple piece of artwork using the lyrics to one of my favourite Halloween songs, and I think it turned out fantastic. What do you think?
Recognize the song? Yes. You guessed it... it's Thriller.
To download and print a copy:click on the picture below, right-click, save it to your computer, and print it like a regular 8x10 picture.
I put my Halloween print in a black wooden frame from the dollar store. It looks really high end beside this dollar store lantern picked up yesterday. You'd never guessed this little vignette only cost a few dollars.
What do you think of the Halloween "Thriller" print I designed? Let me know (in the comments) how you plan to display it in your home.
Like everything else, Halloween is a bit different this year with Covid restrictions in place. However, there are lots of ways to still keep it fun for kids. Today, I am sharing ideas a few ideas for social distanced (Covid-friendly) Halloween fun!
1) Safe trick or treating - Some people are not comfortable with trick or treating this year, but for those that are, social distancing and proper hygiene are extremely important. People who are handing out treats should sanitize their hands between visitors and keep high touch areas (such as door handles) clean. Trick or treats should try not to gather in large groups, and they should wash their hands before heading out and when they return home.
Having pre-packaged bags of treats (that prevent several kids from touching the same treats) is a great idea too. How cute are these gloves full of goodies? You can even print off a "punny" sign for free here.
2) Decorate - Investing some extra time decorating this year is a fantastic idea. And if you want to get the whole neighbourhood involved, you can opt for a house, window, or door decorating competition.
It's fun decorating, but driving or walking around looking at other family's decorations is enjoyable too!
3) Halloween movie night- A festive movie night at home is a simple, covid-friendly way to celebrate Halloween. You can find my favourite treat idea and Halloween movie choices here.
4) "Boo" the neighbours - My boys have been "booing" the neighbours since 2011, and it's a perfect activity for this year. Fun treats... and no contact required. Find the full instructions and free printable sheets here.
5) Carve pumpkins, eat the seeds, and make some magic - Carving pumpkins is a tradition in most families, but don't forget to cook the seeds and plant a few to create some magic!
Cook the seeds.(To roast pumpkin seeds: clean and pat them dry, spread on a cookie sheet, drizzle with melted butter, sprinkle with salt, and bake at 300 for approximately 45 minutes... stirring occasionally.)
Plant a few "magic" pumpkin seeds. Find out how to create the magic here.
6) Play Halloween Bingo or go on a Halloween Scavenger Hunt- Playing games on Zoom or going on an outdoor scavenger hunt is a great way to celebrate this year. You can create your own games, or you can download the scavenger hunt I designed (for free) here.
7) Costume Contest and Parade - DIYing costumes, and showing them off in the neighbourhood is the best way to celebrate Halloween. Organizing a parade or costume party is a wonderful covid-friendly option this year. Check out my 25 FAVOURITE no-sew DIY costume ideas here.
There are many covid-friendly ways to celebrate Halloween this year, but these are 7 of my favourite options. What will you be doing on October 31?
A blank door makes a perfect canvas for inexpensive Halloween decorating. With a few cheap supplies, you can create a vignette that makes a huge impact. Today, I am sharing my favorite easy and inexpensive ways to decorate a door for Halloween.
Creating a large shadowy piece of artwork is a fanastic door decorating option. I used a couple of pieces of bristol board to create this spooky forest scene. I drew it, cut it out, and attached it to the door with painter's tape. Cute, right?!?!
A white door makes a good "mummy" too. Use painter's tape to cover the door in strips of cheesecloth, and add a couple of googly eyes made from cardstock. I love this one!
Alternatively, you can just add a wreath to an interior or exterior door of your home. This is a DIY wreath I made from a pool noodle. It was easy to make, really inexpensive, and I love it! You can find the step by step instructions for this Halloween wreath here.
How are you decorating the doors in your home for Halloween? I hope you try one of my easy and inexpensive DIY ideas.

.png)


.jpg)


.jpg)


.jpg)