When the Easter decorations have been put away, it's a clear sign that Spring is on its way. I love getting organized and refreshing my home for Spring, and my YouTube channel is full of easy and inexpensive ideas for making the most of the season. Check out some of my favourite budget-friendly SPRING finds and DIYs below.
These Spring DIYs are made mostly using dollar store supplies. The umbrella wreath could not be easier, and it's one of my most popular Spring decor projects.
The DIYs are also super-easy. I love the clever use for garden markers.
What's easier than putting a FREE print in a dollar store frame??? That idea and more here:
I love using a tiered tray to create a Spring vignette... and it's sooo easy to make one using glue, dollar store plates, and a dollar store candle holder. The full instructions and more simple ideas here:
And if you are looking for an easy transition from Spring to Summer, you are going to want to check out this video:
If you like these ideas, don't forget to subscribe to my YouTube channel. I have many more fun videos planned, you don't want to miss out.
Aren't simple ideas the best ones? Today, I'm sharing fantastic dollar store DIYs for Spring -- they are easy, inexpensive, and super-cute! (And there is a short step-by-step video at the end of this post, so make sure to check it out. 🙂)
How adorable is this rustic Spring wreath? It looks high end, the materials are super-cheap, and it's soooo easy to make. Wrap a wreath form in twine, wrap more twine around the middle, and insert dollar store florals. Easy peasy!
This umbrella wreath is another great DIY for Spring. Simple take a dollar store children's umbrella, pop in some dollar store flowers, and tie with a ribbon. That's it!
This porch hanger is cute too. The tin bucket came from the dollar store, and I added words with my Cricut. Then, I popped in some floral foam and inserted fake flowers. It was simple to make, and it would be a cheerful addition to any porch.
This riser looks high-end, but it only cost a couple of dollars to make. It's just a dollar store plastic bowl glued to a dollar store plastic plate. I love a 30 second DIY that looks like it came from a high-end store!
Alternatively, you can use the same technique to DIY a tiered tray for Spring. Glue a large plate, a candle stick holder, and a small plate together. I got all the supplies for this one at Dollarama.
For a closer look at these DIYs, check out the video I made (below).
Seasonal decorating is a fantastic way to periodically refresh your home. And one of my favourite EASY things to do is to update the artwork on a clipboard frame I made using dollar store supplies. Today, I'm sharing a FREE print for Spring that you can download and use. You are going to love this idea!
Isn't this print simple and adorable for Spring? I printed it at my local copy store, and I absolutely love it!
To download your own copy: click on the photo below, right-click, save it to your computer, and print it like a normal 8x10 photo.
I put the print I designed on a dollar store clipboard that I dressed up with a bit of ribbon and some dollar store paper flowers. I love how easy it is to update this budget-friendly frame with new seasonal prints, don't you?
Alternatively, you could stick your free print in a frame. I love how it looks with some dollar store florals.
What do you think? Do you love the muted colours I used for this free Spring print?
Do you prefer the clip board frame? Or is the framed print more your style?
I love seasonal decorating on a budget, don't you? And Spring is the perfect time for a bit of a decor refresh... and little dollar store DIY. Today, I' sharing a few NEW dollar store DIYs for Spring.
One of my favourite DIYs I made this year was a fence I crafted from dollar store plant markers. They are inexpensive and perfect for crafting a versatile piece of Spring decor.
I started by painting the plant markers with white paint and dry brushing them with a bit of grey paint. Then, I used hot glue to attach the posts together with another one of the posts.
I love this fence as a back drop for other Spring decor items.
These great rounds are another fantastic dollar store crafting material. I bought this package of 6 rounds for $4. You can't beat that!
I taped off sections of the round, and painted them in different colours.
Then, I used my Cricut to cut out the words "Hello Spring", and I hung my round over a wreath I purchased at the dollar store a couple of years ago.
If you don't have a Cricut, you can use a stencil, paints, stickers, or window clings attached with Mod Podge.
Another great project uses the clay pots they sell at the dollar store. I started by painting them with white chalk paint.
Then, I taped them off and painted the rims with different Spring colours -- one light green, one light pink, and one light blue.
When they were dry, I used my Cricut to add the words "Plant", "Bloom", and "Grow" to the pots. Then, I filled the pots with floral foam and fake flowers. I think it looks great in front of the fence I made. Not bad for a couple of dollars, right?
The last craft was a tiny faux book stack I made with scraps of wood. You could also use dollar store jenga blocks glued together.
I painted one dark pink, one light pink, and one white. Then, I attached them together with hot glue, and wrapped them with twine.
I finished by attaching a bit of Spring greenery to the top.
I displayed them on top of a dollar store candle holder I painted with white paint, but they would be adorable on a tiered tray too.
How great are these dollar store DIYs for Spring? Which one is your favourite?
For more information on crafting these simple projects, take a peek at this short video.
I hope you enjoyed these dollar store DIYs. I love easy and inexpensive home decor, and the dollar store is a fantastic place to get inspiration and supplies.
As winter comes to an end, I love adding inexpensive Spring decor to my home. Don't you love how the colours and textures of Spring make your home feel bright and re-freshed?
Today, I'm sharing a few NEW Spring Decor DIYS that I made using dollar store supplies. (And don't forget to check out the short, easy-to-follow "how to" video below.)
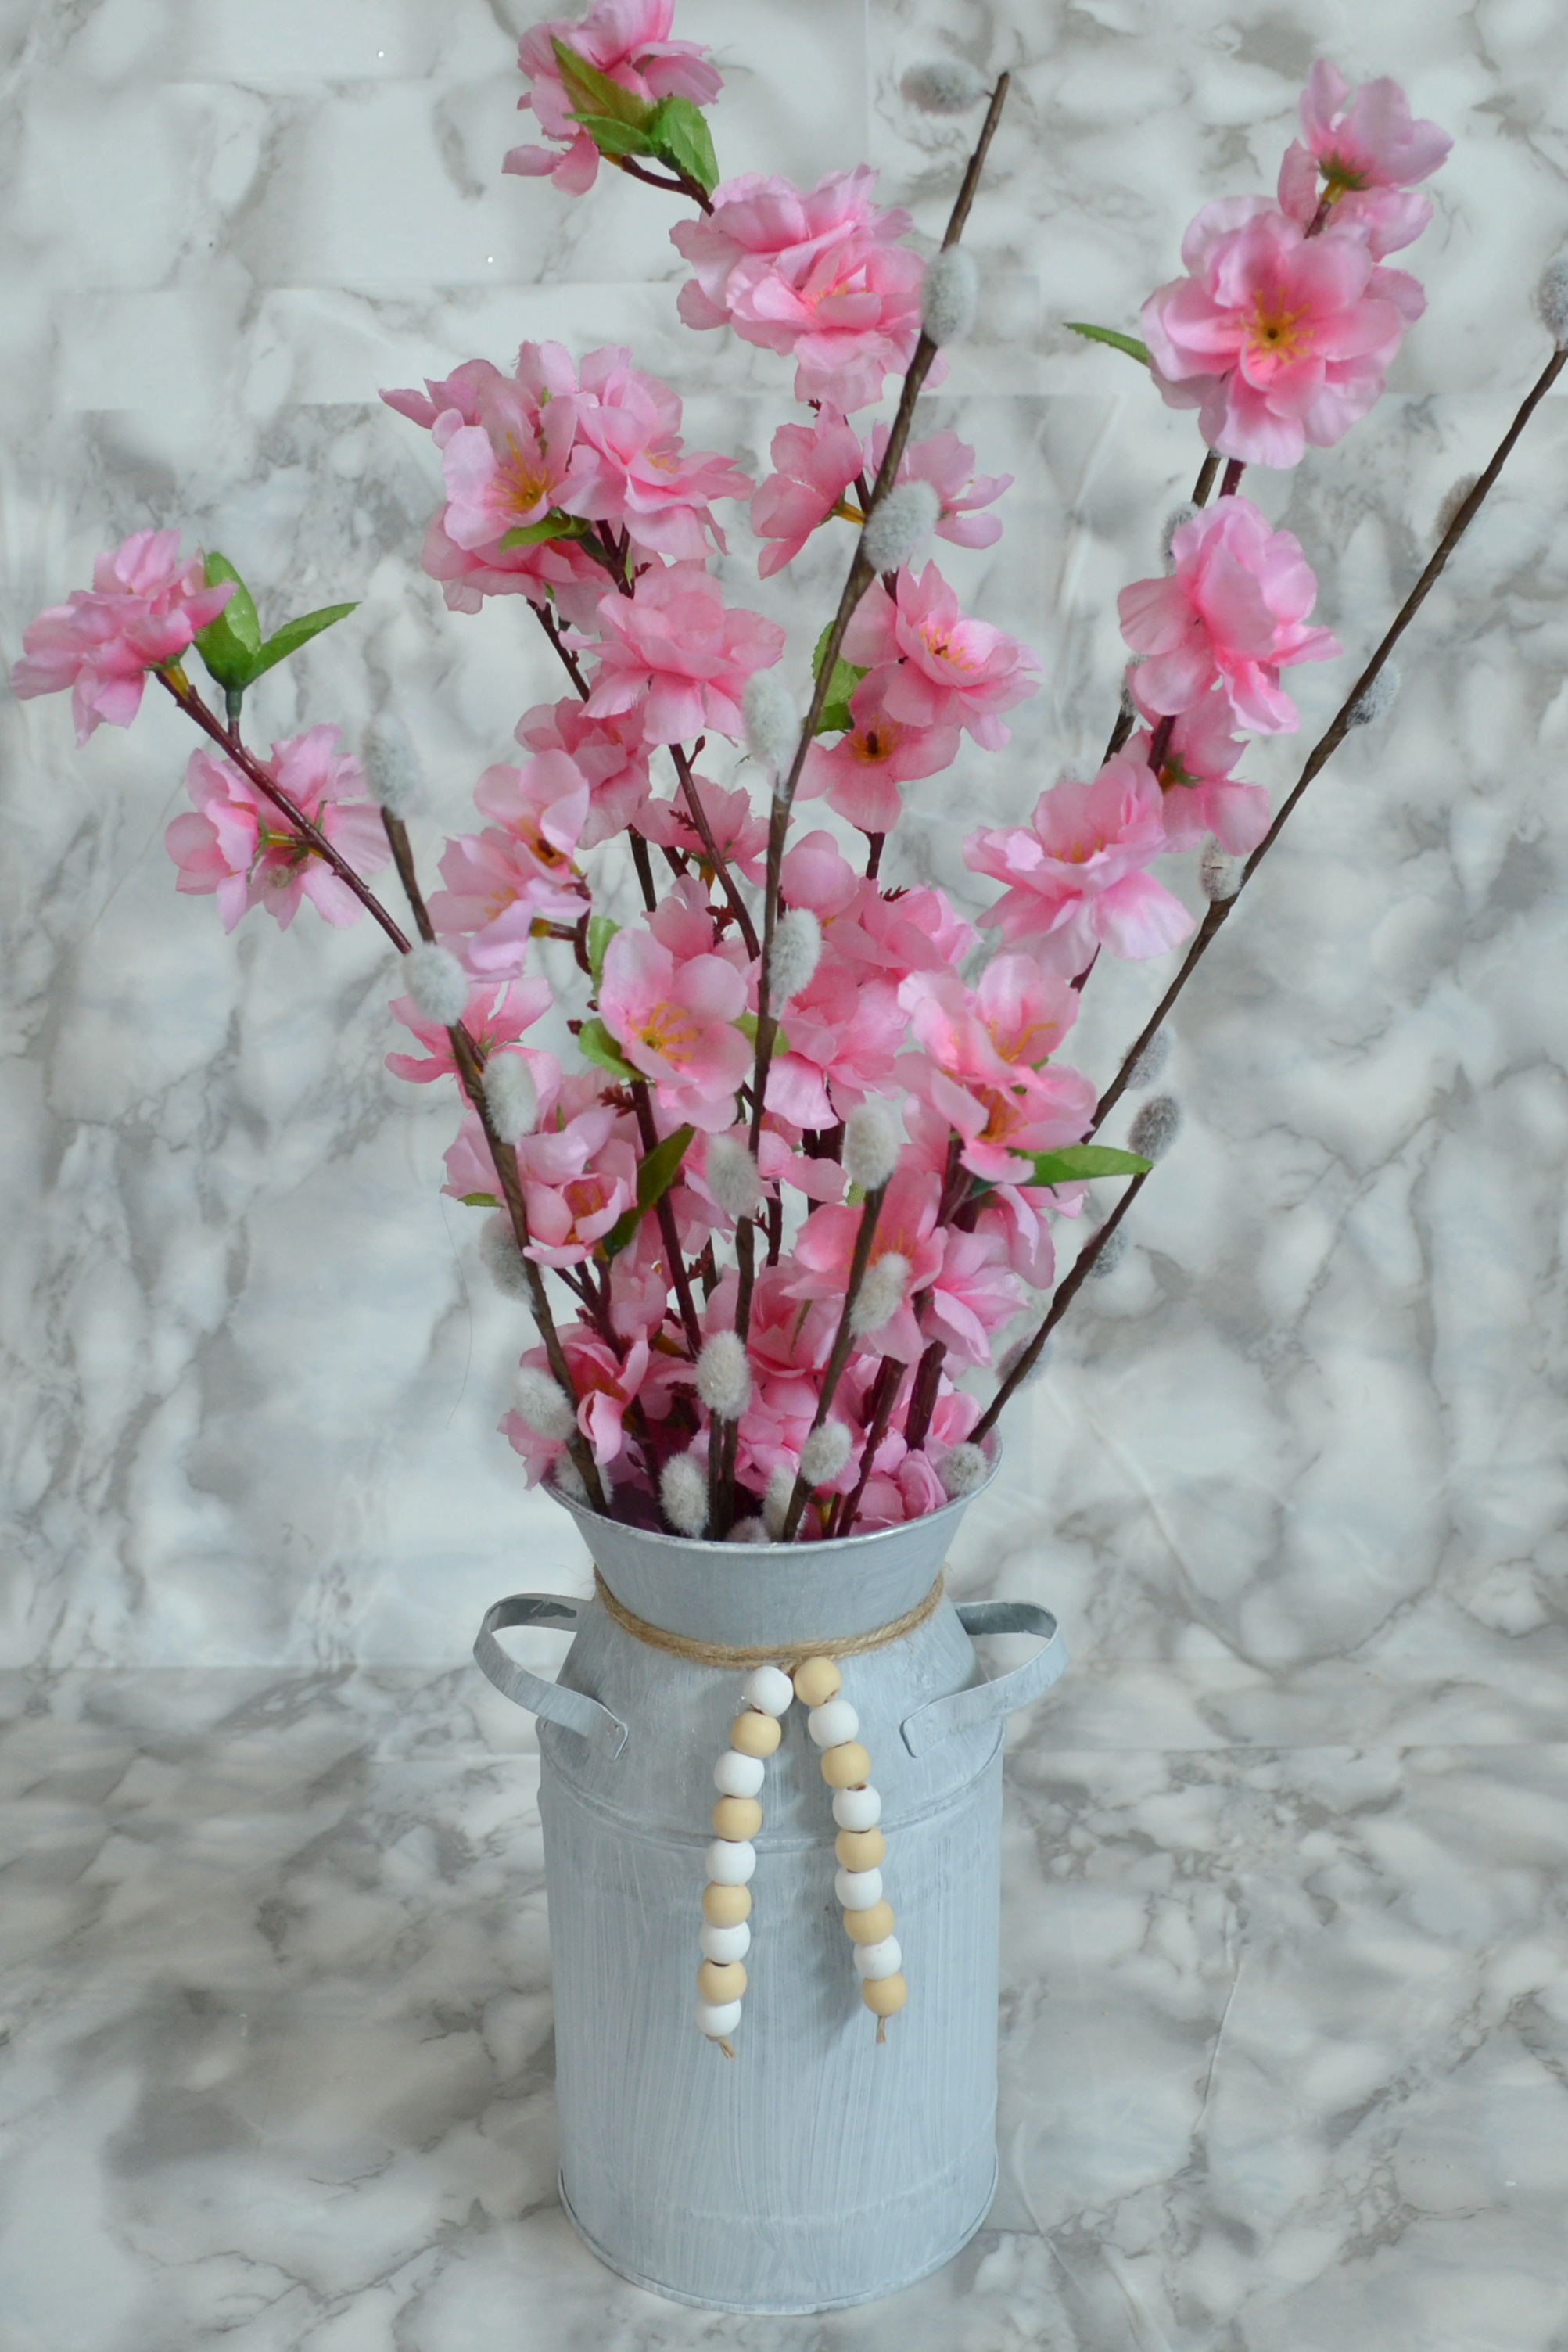
One of my favourite dollar store hacks is making use of their seasonal florals. This year I found these fantastic apple blossom and pussy willow stems.
I cut pieces for the stems, and arranged them in this dollar store milk jug. Then, to dress up the milk jug, I added some twine and wood beads. Cute, right?!?
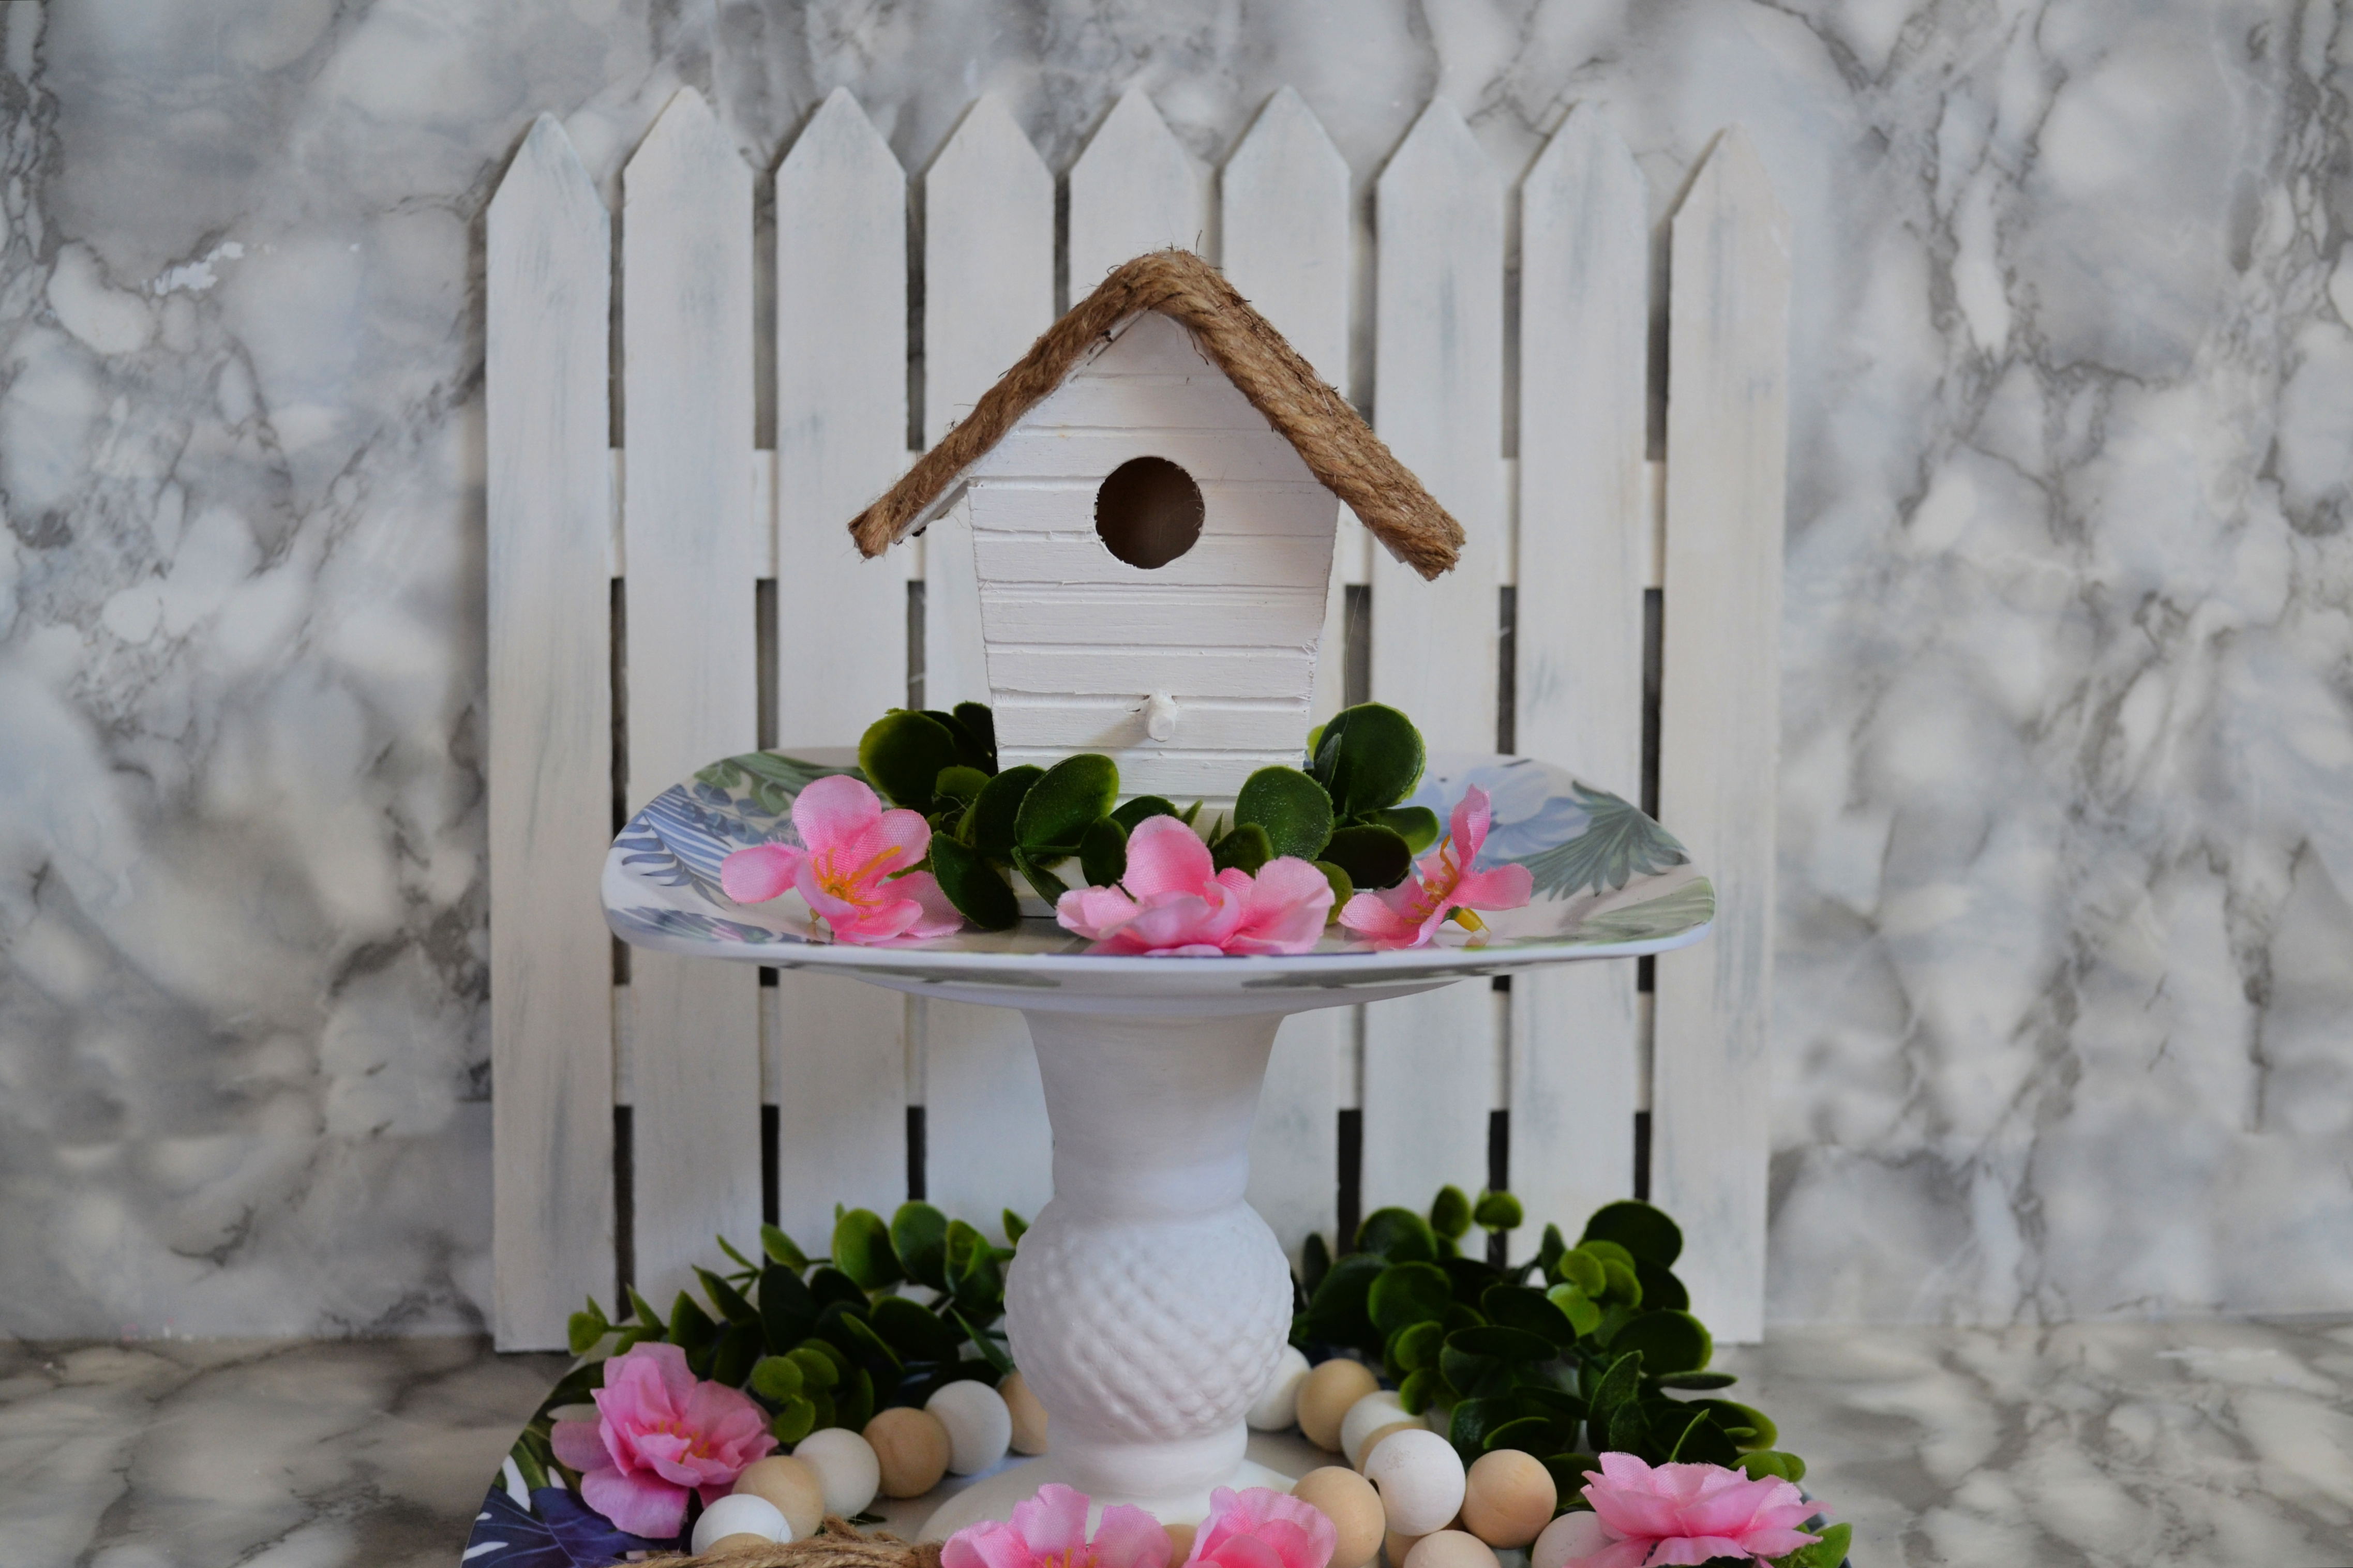
Bird houses are another option for Spring decor, and I love this unfinished wooden one I found at my local dollar store.
I ripped the hanger from the top, painted the birdhouse white, used hot glue to attach strips of twine to the roof, and wrapped a ring of greenery around the base. It's a perfect piece of decor on it's own, but it's also perfect for a tiered tray.
And... if you are looking for an inexpensive Spring tiered tray option, I have a simple (and inexpensive) DIY option you are going to love.
I started with two plastic plates and a candle holder from Dollarama.
Then, I painted the candle holder with white chalk paint and used hot glue to attach the plates to the candle holder. I decorated it with the birdhouse, wooden beads and some Spring florals. No one will ever guess this is a dollar store DIY!
To see the step by step instructions for all these dollar store crafts / dollar store DIYs, check out the "how to" YouTube video I made below.
I love how all the projects look together, don't you?
Are you interested in more Spring DIYs? I have more great easy and inexpensive projects coming soon, so make sure to take the time to follow me on social media so you don't miss out on any of the fun.
As a DIYer (and a budget conscious mom), I always see things in stores and think "I could make that for a lot less". Do you do this too? So, recently when I saw a cute planter online, I challenged myself to make it using dollar store materials... and it turned out great! Check out how I made a high-end Wayfair planter using dollar store supplies.
This is the Wayfair version for $141.99...
And here is the one I made for $10 using dollar store supplies. Pretty great, eh?
Here's what you need for my version. (All these supplies came from the dollar store.) A package of stir sticks (4 for $2... but I only used half the sticks... so $1 worth), a dollar store tin planter ($4). a bird house with a tin roof ($4), and miscellaneous supplies you like already have on hand (like glue and paint and a bit of moss, if desired). I allowed $1 for miscellaneous... but even if you had to buy some paint and glue... this DIY version is a lot cheap than the store-bought one.
And here's how you make it:
1) Cut one of the stir sticks for the "Blooming" sign. (Mine was about 7 inches.) A small hand saw would be great, but I couldn't find mine, so I used an exacto knife, and I smoothed the edges with a nail file. Whatever works! lol
2) Use an x-Acto knife or small hand saw to cut out a notch (the width of the paint stick) in the base of the birdhouse.
3) Paint the birdhouse, the paint stick, and the piece you cut from the paint stick. (I used white chalk paint, but any paint would work.) You can also apply a sealant if you are going to be putting it outside, but mine is going under a covered porch, so I didn't bother.
4) Dry brush with a bit of grey paint if you want a more "aged" look.
5) Use a combination of hot glue and wood glue to attach the paint stick to the base of the bird house AND to attach the piece of the small stir stick the big stir stick.
6) Use a Cricut, a paint marker, or dollar store stickers to add the word "Blooming" to the small stir stick.
7) Use hot glue to attach the stir stick to the planter, and reinforce with duct tape.
8) I added some dollar store moss to the base of the bird house... but this is totally optional. The one at Wayfair was plain, but I thought a bit of moss added to the rustic look.
For a closer look, take a look at this video I made...
I plan to plant flowers in my new planter, but since it's still early in the season, I inserted some craft form and stuck in some artificial greenery. It looks super-cute on my covered porch.
What do you think? I know it is not exactly like the $141.99 planter I was inspired by, but I think it's a pretty good "copy" for only $10.
Let me know if you make one. I'd love to see your version!

.jpg)
.jpg)
.jpg)
.jpg)
.jpg)
.jpg)

.png)


.jpg)
.png)

.jpg)
.jpg)
.jpg)


.png)
.png)

.jpg)
.jpg)
.jpg)
.jpg)


