Birthday Letter to my Awesome Four Year Old

Today, my middle son turns four. (If anyone knows how I can slow down time, please comment below.)  

Here is our first picture together.


Last week (when my youngest turned two), I came up with the idea of writing "Birthday Letters" for each boy every year on their birthday.  Here is this year's birthday letter for my spunky, second born son.


Today you turn four.  I can hardly believe you have gotten so big, and I am happy that I still have one more year with you before you start "big boy" school.  We have a lot of playing and cuddling to do before then!  :-)

Here is a "snap shot" of what makes you the most special four year old in the whole world.
  • I love the way you say the color "lellow"
  • You idolize your big brother, and run to greet him with a big hug when he gets off the school bus.
  • You love your little brother -- you are buddies, and you love to play with him and teach him things.
  • You love to cuddle, and you need to sit on my lap when I read you stories.
  • You love playing sports.... anything with a ball or a puck.
  • When you watch "Super Why", you sing the theme song at the top of your lungs, and it makes me smile every time.
  • Sometimes, when you are trying to get my attention, you yodel.  (You are always making Daddy and I laugh!)
  • You love to sing and dance.  (Dancing to Michael Jackson's Smooth Criminal is one of your favorites.  You always wear a black hat and take it very seriously.)
  • You love when Daddy tickles you. 
  • You love baking with Mommy.
  • You love playing cars with your brothers, and you want to be a race car driver when you grow up.  (I sure hope you change your mind and decide to do something less dangerous.)
  • You always cuddle your Blankie, suck your thumb, and play with your hair when you are tired. 
  • You have an adorable and infectious giggle.
  • You give big hugs and soft kisses.
Happy Birthday my little Owen B.!  Mommy loves you very much!

Love, Mommy xoxox

BEAN BAG TOSS -- the Super Why way!

For my boys' Super Hero birthday, we had an obstacle course, and one of the elements was a bean bag toss I made out of an old box.  It was one of the highlights for my boys.  They played with it for weeks before the party.  Here's how I did it:


You'll need:
  • a box with a lid (reinforced with packing tape)
  • paint and paintbrush
  • something sharp to cut holes with
  • a picture of a super hero (I printed mine off the internet)
  • Modge Podge

Step 1:  Paint the box, and use Modge Podge to attach a picture of a Super Hero to the middle of the lid.


Step 2:  Draw four circles on the lid, and cut out with something sharp.  (I used an X-Acto knife.)

Step 3:  Prop up the lid of the box on the bottom of the box to create an angle.  (See picture below.)

That's it -- cheap, easy, and lots of fun

You can buy small balls or bean bags, but if you want to make matching bean bags like I did, here is what you do:
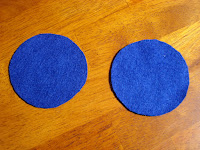
  1. Cut two circles out of felt.
  2. Embelish the top circle.
  3. Add rice to the bottom circle.
  4. Secure with a circle of hot glue and some stitching (to ensure that the rice doesn't fall out)

Happy Tossing!


Gina Bell (aka East Coast Mommy)  
 
** If you haven't already "liked" me on facebook, I would love to have you join me here.

Happy Birthday Baby Boy (Birthday Letter)

Today, my baby boy turns two. (Not sure how that happened... time goes by so quickly.)  Check out the picture of when we first met -- a sweetie pie from the very start!  :-)


Birthdays get me thinking about how fast time goes by, and how special these years are with my little boys.  I want to remember the little details, and I came up with the idea of a "Birthday Letter" -- which I wish I had thought of earlier (but better late than never, right?)  I am going to try and do a letter for each boy every year on their birthday.

Here is this year's birthday letter to my sweet boy:

To my baby boy,

Today you turn two... it seems like just yesterday you came into our lives and completed our family.  Here is a "snap shot" of what makes you the most special two year old in the whole world.
  • You have very good manners, and have the sweetest voice when you say, "Thank you, Mommy".  I melt a little every time.
  • You love to cuddle... especially at bedtime, and you always play with my hair when you are tired.
  • You have a special blanket, and you always want to cover yourself in it... even when it is super hot.
  • You love when Daddy tickles you.
  • You love to play with your brothers, and you follow them everywhere.  You especially love playing hide-and-seek, hockey, and cars.
  • When I tuck you in, you always whisper, "Good night, Mommy.  I love you."  I always leave your room smiling.
  • Your favorite foods are: Cheeseburgers, Pizza, and Cookies (just like Daddy).
  • Your favorite shows are: Curious George, Super Why, and The Wiggles.
  • Your favorite books are:  Good Night Moon, Brown Bear, and any book about Hockey.
  • You love music and dancing... and I love to listen to you sing and watch you dance.  (You are definitely trying to keep up with your brothers, and you are doing a great job.)
Happy Birthday sweet Jackie-Jack!  Mommy loves you very much!

Love, Mommy xoxox

Isn't he just the cutest two year old?  :-)

Gina Bell (aka East Coast Mommy)

Super Cute Monkey and Frog Clips

How cute are these monkey and frog clips?  {FYI... the one in the middle is my three year old little monkey.  Pretty cute, eh?} 


Want to make some for your little monkey?  First, gather your supplies.  You'll need:
  • scraps of felt (green for the frog and brown & tan for the monkey)
  • small black buttons
  • needle and embroidery thread (black, green, and tan)
  • scissors
  • glue gun
  • clips (alligator or snap clips work)
  • templates (Click here for the templates.)
For the Frog clip:

Using the template as a guide, cut a front piece and a back piece from the green felt.


Sew on two button eyes, and use black thread to back-stitch a nose and mouth.


Using green thread attach the front piece to the back piece.  Use a glue gun to attach a clip to the back.


For the Monkey clip:

Using the template as a guide, cut a back piece from the brown felt and a front piece from the tan felt.

On the front piece, sew on two button eyes, and use black thread to back-stitch a nose and mouth.


Using tan thread, attach the front piece to the back piece.  Use a glue gun to attach a clip to the back.


That's it!  If you haven't already, I would LOVE if you would follow me on facebook.  I have lots of tips, tricks, and tutorials to share. 

Thanks, 
Gina (aka East Coast Mommy)

DIY Pirate Party

I have three boys, and Pirates are VERY popular in our house.  So... for my oldest son's fourth birthday, we had a really easy DIY Pirate Party.


The cake was my son's favorite part.  I made it using a few modifications to the one I found here.  It was super simple, and I think it turned out pretty cute.


When the guests arrived, they were given a Pirate Treasure Map {which you can download here}.  They had to complete each task, and at the end, they got their own little treasure.


Task #1 - Make a Pirate Treasure (necklace).  Everyone was given a piece of shoe string licorice and a bowl of fruit loops.  They strung them together to make a necklace.  Fun, eh?

My Pirate Birthday Boy
Task #2 - Make a Pirate Telescope.  To keep it easy, I made the telescopes ahead of time, so all the kids had to do was decorate them with markers and stickers.  (I covered a paper towel roll with black paper.  Then, I covered one end with plastic wrap, taped it, and hid the tape with a strip of yellow paper.


Final Task -- Get a Pirate Tattoo, and collect the prize (a treasure box filled with treats).  

I think this was a lovely, simple pirate party.  All the kids were busy, everything ran smoothly, no one cried, and a good time was had by all.  You can't ask for more than that! 

♥ 
Gina Bell (aka East Coast Mommy)

PS (If you like Pirates, you might also like our "Pirate Play Date".)

Foam Super Hero Masks

These foam Super Hero masks are really simple to make, and they turn out "super" cute.  {I can't resist a pun.}  I am making a bunch for my boys' Super Hero party, but they will also make a great addition to our dress up box.


To make your own foam Super Hero masks, you'll need:
  • foam sheets (I used Elmer's foam sheets in Royal Blue)
  • thin elastic
  • scissors and a hole punch
  • a paper super hero mask template


Then:

1) Use a paper template to cut out a mask "shape" from the foam. (You can draw your own, or you can download the one I drew here.) Use the hole punch to punch a hole on each side.


2) Measure the elastic to fit the child's head.  (Mine were a little over 12 inches.)


3) Tie the elastic through the holes in the mask, and secure with a double knot.


That's it!  Don't you just love this foam Super Hero mask?  They are easy, inexpensive, and a lot of fun!

♥ 
Gina Bell (aka East Coast Mommy)

PS... if you are looking for an easy "no-sew" matching Super Hero cape, you can find a tutorial here.

Last Day of School

Today was the last day of Grade Primary for my oldest son.  Where did the year go? 

I have seen a number of "Welcome Summer" banners around the blogosphere, so I thought I would adapt the idea and make a "Grade Primary Finish Line" banner{So much fun!}


My son was sad to say goodbye to his very first teacher, but excited to run through his banner and head out for ice cream. Now we are all ready for the carefree days of summer! :-)


Gina Bell (aka East Coast Mommy)  

Don't miss any of the fun....