Showing posts sorted by relevance for query tissue paper. Sort by date Show all posts

20+ of THE BEST Christmas Crafts for Kids

Holidays are the perfect time for crafting with kids, and today I'm sharing some of my favourite Christmas crafts (broken down by category: paper, popsicle stick, and textile crafts). I have crafts that can be used as decor and super-fun ornaments that can be gifted or hung on the tree. There is something for all ages and skills on this list!


PAPER CRAFTS

Paper Crafts are wonderful for all ages... but especially younger kids. The materials are easy to find, and the crafts they make are easy, inexpensive, and fun.


1) Reindeer artThis simple reindeer painting is easy to make, and it is a sweet piece of holiday artwork. Draw a reindeer head, antlers, and nose on a piece of white paper. Colour the reindeer parts, cut them out, and glue them onto a piece of heavy coloured paper. Add a googly eye (with white glue), and cover the paper with snowflakes made from dipping a Q-tip in white paint.


2) Cheerios TreeThis Cheerios tree is another simple way to craft and work on fine motor skills with kids. Draw a tree, have the kids colour the tree, and decorate the tree with glue and Cheerios. If you didn't want to use Cheerios, stickers would work well too.


3) Photo ornamentPersonalized ornaments are always special, and this simple reindeer photo ornament is absolutely adorable! Cut a circle from a piece of card stock, glue on a photo of a child, draw reindeer antlers, and add a red sticker nose. Attach a string, and give it as a gift or hang it on the tree. Cute, right?


4) Paper Santa Start with a red triangular piece of construction paper. Cut the top from a white cupcake liner, and glue it to the triangle with white glue. Cut a circle from card-stock for the face, and use glue to attach it. Cut a belt and gloves from black paper, and attach with glue. Finish by adding googly eyes, a paper moustache, buttons, and cotton.


5) Paper Strip Tree Start with a sturdy piece of paper. (I used yellow cardstock.) Cut strips of paper in various colors and lengths. Glue the strips to the card-stock. Add a glittery star sticker to the top of the tree.


6)  Toilet roll tree - This little tree is totally adorable, and the toilet roll allows it to stand on its own.  Draw a simple tree shape onto cardstock, cut it out, color it, and add sparkly stickers.  Then, cut a piece of toilet roll for the tree trunk, cut a couple of slits halfway down the sides, and insert the decorated tree into the trunk.


7) Santa beard - This Santa beard is just as fun to play with as it is to make.  Download the template here.  Then, cut out the beard, add a popsicle stick, and have the child cover the beard with cotton balls.


8) Gingerbread Man - This little ornament is adorable and easy to make.  Download the template here.  Then, have your little crafter decorate it with crayons, googly eyes, yarn scrapes, and buttons.


9) Tissue paper wreath
I love this simple tissue paper wreath, and it's a wonderful craft for the kids to do on their own (while you wrap some presents).  Cut a circle out of the centre of a paper plate, and then have the kids crumple tissue paper squares, dip the tissue paper in glue, and attach them to the wreath.


10) Santa going down the chimney - This craft is nothing short of adorable. I started by drawing a chimney on a piece of card stock. Then, I drew a pair of Santa pants on cardstock, cut them out, and taped them to a craft stick.

The secret is a slit (made with an X-acto knife) across the top of the chimney. The kids will delight in watching Santa disappear inside the chimney.


11) DIY gift bags - I love a practical craft, and these DIY gift bags are fantastic.  The kids can add a tree or reindeer to a plain brown bag (from the dollar store), and then use it to wrap a special Christmas gift.  


POPSICLE STICK CRAFTS

Popsicle sticks are inexpensive, and they are the perfect material for crafting adorable ornaments.


12) Elf popsicle stick ornament - Paint a stick green (except for the face). Decorate with markers, paper ears, googly eyes a sticker buckle, a felt color and hat, and a green pom pom. Finish by hot gluing a twine hanger to the back.


13) Santa popsicle stick ornament - Paint a stick red (except for the face). Decorate with markers, yarn, googly eyes, a button buckle, and a pom pom. Finish by hot gluing a yarn hanger to the back.


14) Santa hat popsicle stick ornament - Paint three sticks red. Glue the sticks into the shape of a hat. Glue cotton balls to the bottom and top of the sticks. Finish by hot gluing a yarn hanger to the back.


15) Tree popsicle stick ornament - Paint two long sticks and one short stick green. Glue into a tree shape. Add a paper truck. Decorate with gem stickers. Finish by tying a piece of yarn through the top of the tree.


16) Gingerbread man popsicle stick ornament - Paint a popsicle stick brown, add googly eyes, buttons, yarn, and a bow. Finish by adding a twine hanger to the back.


17) Snowman popsicle stick ornament - Paint a stick white. Add a paper hat and paper nose, glue on buttons, tie on a felt scarf, and add details with a Sharpie. Finish by hot gluing a twine hanger to the back.


YARN & TEXTILE CRAFTS

Yarn and textiles are great materials for all ages... but especially for older kids. Even tweens and teens will enjoy these simple (more mature) Christmas crafts.


18) Yarn hats - This is one of my favourite holiday crafts. I've made these little ornaments with all my boys' classmates, and everyone loved them. All you need is some yarn and old paper towel rolls. Find the full step by step tutorial here.


19) Yarn wrapped reindeerStart with a piece of heavy cardboard, cover it with white glue, and wrap the cardboard with yarn. Add googly eyes, a red pom pom nose, clothespin antlers, and a yarn hanger.


20) Felt ornamentsFelt is a wonderful, easy, and inexpensive material to use for making Christmas ornaments. It lays flat, it is easy to cut, and you don't need to worry about fraying edges. Kids that are "beginners" when it comes to sewing, will love these simple felt Christmas ornaments. Find some of my favourite felt ornament ideas here.


21) Spare sock snowman - This is one of the most popular posts on this blog. People LOVE making these adorable sock snowpeople. To make your own, you'll need: a single white sock, some peas or rice, felt, a pom pom, googly eyes, elastics, cotton, buttons, and the step-by-step tutorial that you can find here.


Aren't these Christmas crafts fun? Do you have a favourite? I've made all these crafts with my boys, and I really don't think I could pick just one!

♥ 
Gina Bell (aka East Coast Mommy)


You might also enjoy the great Christmas ideas here.

Simple Summer Crafts {with free printable templates}

It would be wonderful if every summer day was sunny... but the reality is that there will always be at least a few rainy days. Today I am sharing some of my favorite simple summer crafts that are guaranteed to keep the kids happy and entertained when the weather keeps them inside.


Paper fan - This adorable paper fan is easy to make, and it is guaranteed to keep you cool when the temperatures start to rise.  To make a paper fan:

1) Download the template I designed here.
2) Color the fan, and cut it out.
3) Tape a craft stick to the back of the fan.


Paper popsicle - I love this simple little paper popsicle craft. Tape a popsicle stick onto the back of a piece of paper, and decorate with markers and sticks. It doesn't get much easier than this cool treat!


Tissue paper flower - This cheerful paper flower is colourful, and it makes a great keepsake when you add a picture of the little crafter to the centre.  To make a tissue paper flower:

1) Download the template I designed here.
2)  Color the flower.
3)  Fill the petals with 1-inch square pieces of tissue paper.  Just crumple up the tissue paper squares, dip them in glue, and attach them to paper. 


Painted rocks - Children love collecting rocks, and a rock makes a fun and inexpensive canvas.  You can find everything you need to know about painting rocks here.


These rainy day craft projects are all easy, inexpensive, and lots of fun for children. What crafts will you make with your little ones this summer?


Gina Bell (aka East Coast Mommy)

10 Dollar Store DIYs for Valentine's Day -- They look high end, but only cost a couple of dollars.

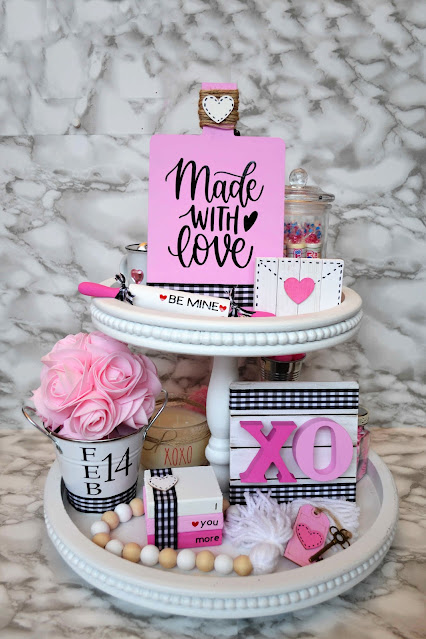
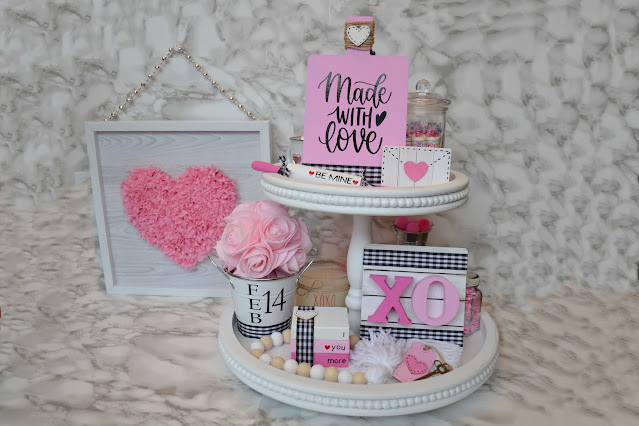
This time of year can be grey and gloomy, so it's the perfect time to add some festive Valentine's Day decor. Crafting a few items is great because they are unique, customizable and budget friendly. Today, I'm sharing TEN fantastic dollar store DIYs for Valentine's Day that you are going to love!


1) Tissue paper artwork - Sometimes simple materials are the easiest to work with and have the greatest impact. For this project, you'll need a dollar store frame, tissue paper, contact paper, scissors and glue.

Then:

a) Cover the glass in the picture frame with contact paper or scrapbook paper.
b) Draw a pencil outline of a heart on the contact paper.
c) Cut a bunch of 1 inch squares of tissue paper.
d) Take a square of tissue paper, wrap it around the end of a pencil, and glue it to the outline of the heart. Continue until the entire heart is covered in tissue paper.
e) Add a hanger if desired. I used a leftover silver necklace from New Year's Eve. lol


2) "Made with Love" cutting board - There is nothing better than transforming a cheap dollar store find into something fantastic. Check out this "I love the Kitchen" sign I recently found at my dollar store. Here's the before...


And here's the after...


I started by painting the cutting board pink, adding some twine and wooden heart to the top with hot glue. Then, I added a bit of checked ribbon to the bottom and a Cricut decal to the centre. Cute, right?


3) Valentine's Day book stack - I love a cute book stack, and I made this one using a few scraps of wood I had in my garage. You could also use real books or dollar store tumbling tower blocks glued together.

I painted the blocks, added a strip of ribbon and a wooden heart with hot glue, and added the words "I love you more". I used my Cricut to add the words, but you could use stickers or a Sharpie too.


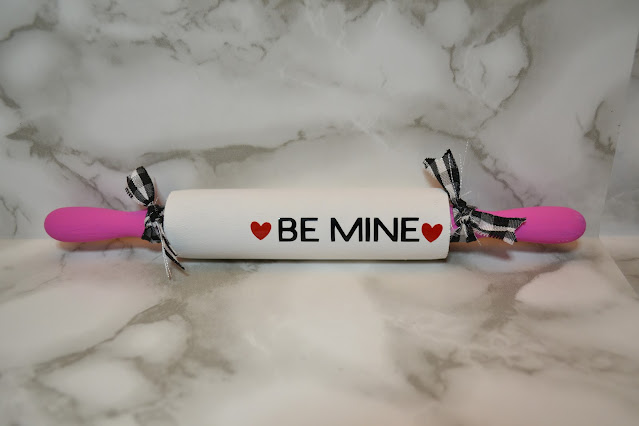
4) Valentine's Day rolling pin - This is a perfect addition to a tiered tray or Valentine's Day vignette. I started with a toy rolling pin, and I painted it pink and white. Then, I added some ribbon and the words "Be Mine". I used my Cricut, but a Sharpie or dollar store stickers would work too.


5) Dollar store pallet sign - I love transforming something simple into something great, so when I found this little pallet sign, I knew I could turn it into a cute Valentine's Day creation. 


I painted it, added some ribbon with hot glue, and attached an "X" and an "O" from an old Tic Tac Toe game that my kids no longer play with. Didn't it turn out sweet?


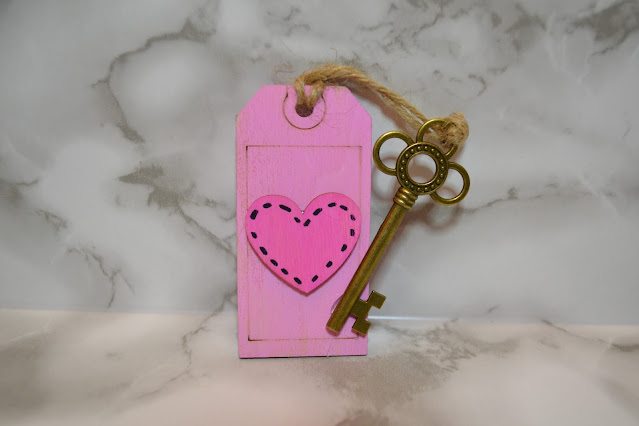
6) Key to your heart - This little key is adorable, and soooo easy to make. I found a bag of these little wooden tags at my dollar store, painted one of them pink, added a piece of twine, and attached a little key. I love how cute this little trinket looks on my Valentine's Day tiered tray.


7) "Tumbling tower blocks" love letter - DIY doesn't get much easier (or cheaper!) than this. Paint 4 tumbling tower blocks, use hot glue to attach the blocks together, trace out the letter shape with a black sharpie, and attached a painted wooden heart with hot glue. Easy peasy!


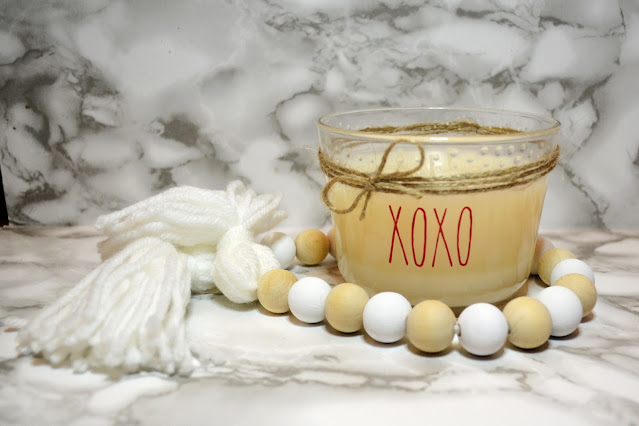
8) Valentine's Day candle - Inexpensive candles make simple Valentine's Day decor, and it is simple to make them look custom and high end. Take a cheap candle, and add a Cricut decal to the front. You could also use stickers or glass markers if you don't have a Cricut. Then, embelish the topof the candle with a bit of twine. Cute and cozy!


9) Dollar store glassware - Dollar store glassware is perfect for creating inexpensive Valentine's Day decor, and you can repurpose it for other holidays too. Try filling a glass jar with love hearts, adding a sticker to the front of a expresso cup and filling it with chocolate kisses, or filling a dollar store jar with pink and white buttons. No craftiness is required for these simple projects!


10) Repurposed wedding decor - The Valentine's aisle isn't the only place to find Valentine's Day decor at the dollar store. The wedding aisle also has some wonderful options. Recently I found this white tin bucket and pink rose flower ball at the dollar store. I added a bit of ribbon to the bottom of the bucket, and made a date decal on my cricut. I absolutely love how it turned out... and it totally screams "Valentine's Day".


Didn't these projects turn out great? Which one is your favourite?


And if you want a closer look at my projects (and step by step instructions), you can check out the video I made here...


I hope you take some time to make one of these Valentine's Day DIYs... or a few. It really is easy, inexpensive and fun to add some unique, high-end decor to you home.

Happy Valentine's Day!


Gina Bell
 (aka East Coast Mommy)


Don't miss out on any of the fun... follow me on social media here.


If you are looking for more Valentine's Day inspiration, check out more than 30 Valentine's Day ideas here.

{Babyfood Jar} Tealight Holders

We made these tealight holders for Earth Day, but they are a perfect use for old babyfood jar any time of the year.  Cute, right?

All you need is a babyfood jar (cleaned out), some blue and green tissue paper, and some glue.  (You'll need to thin out the glue to the consistency of paint -- approximately 3 tbsp glue for each 1 tbsp water.)

Here's how easy it is to make one of these adorable tealights with your little one:

First, cut the tissue paper into little squares.  They don't have to be uniform or a certain size because they are going to be layered onto the jar.


Then, using a paintbrush, apply glue to a small section of the babyfood jar, and attach a piece of tissue paper.  Continue to apply glue and tissue paper until the entire jar is covered.


Finally, wait for the glue to dry, and then apply a thin coat of glue over the top of the tissue paper. 


My boys love making these, and you can change the colors to suit any occasion.  

Just make sure to never leave a child alone with a burning candle.  Battery operated tealights might be a safer choice.

♥ 
Gina Bell (aka East Coast Mommy on facebook)

*Originally posted at Okanagan4Kids.com on April 17, 2012.

Don't miss any of the fun....