Heart Rosette Valentines Wreath {take two}

A couple of weeks ago, I shared a heart-shaped felt rosette wreath I made using a wreath form made from an old cardboard box.  I changed my mind about the ribbon, and thought I would show you my new version.  Here it is:


And in case you missed it, here was what it looked like before.  


Which one do you prefer? The full tutorial for the original wreath can be found here.


... and you can find a tutorial for felt rosettes here.)


I love the classic and clean look of the new version. What do you think?
♥ 
Gina Bell (aka East Coast Mommy)

{Make Ahead} Banana Chocolate Chip Muffins

I am always looking for ways to get organized, and today I am sharing one of my favorite ways to simplify the "making lunches" process.  I make big batches of baked goods, individually package them, and pop them in the freezer.  Today, my four year old made our favorite Banana Chocolate Chip Muffins.  


The recipe we use can be found at DianaDesserts.com (but we make "mini muffins", and reduce the baking temperature to 350 degrees).

I love three things about this recipe:

1)  The muffins are moist and delicious.

2)  It is a fun to bake them with kids.  "Little hands" can fill the tins with muffin liners, mash the bananas, and add and stir the ingredients.

3)  They make perfect "little treats" for school lunch boxes.  (I freeze them in individual snack bags, which makes them easy to "pop" into lunches each night.)


Give them a try, and let me know what you think.

♥ 
Gina Bell (aka East Coast Mommy)

Recycled Crayon Valentines

I am always love cute, easy and inexpensive gifts the boys can give to their little friends.  This year, my four year old is bringing these adorable heart-shaped crayon Valentines to his Preschool pals.


Cute, right?


Want to make some?  Dig out your old broken crayons, and follow these simple instructions.

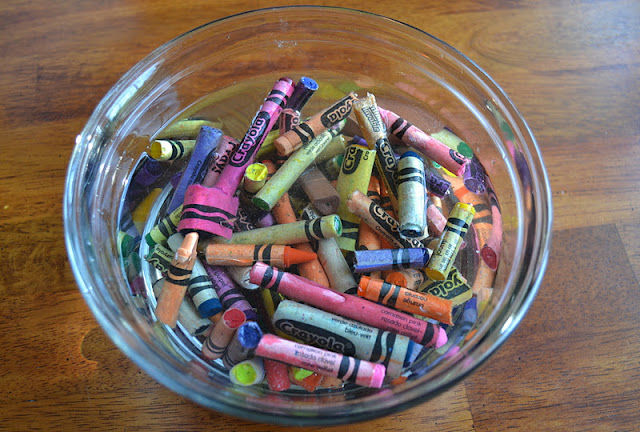
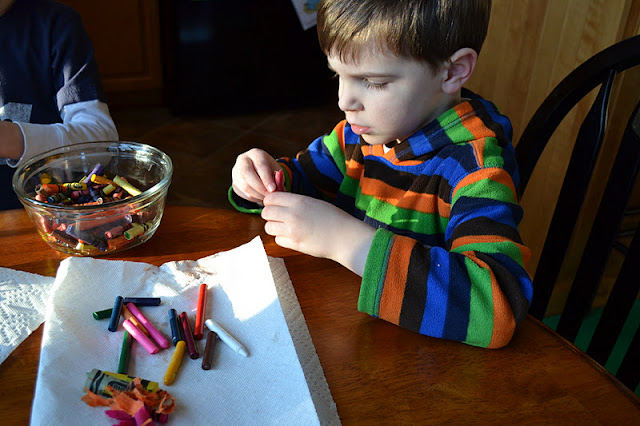
Step 1 - Soak the crayons in water, and put the kids to work peeling the paper off the crayons.


Step 2 - Break up the crayons and put them in a heart-shaped muffin tin.  I found this silicon one at the dollar store.  (Don't forget to put the flimsy silicon muffin tin on a proper cookie sheet before you pop it into the oven.)


Step 3 - Melt the crayons in the oven.  (I set my oven to 300 degrees, and it took about 10 minutes for all the crayon bits to turn to liquid.) 

Step 4 - Carefully remove the tray from the oven, and let the crayons cool completely.  (I put mine outside to speed up the cooling process.)


Once you "pop" the crayons out of the tin, they are ready to give out.  I attached ours to cards (which I printed on my computer) that read, "I having a friend like YOU!", but you can package them any way you like.


Much better than a bin of broken crayons, don't you think? 

Happy Valentine's Day!


Gina Bell
 (aka East Coast Mommy)


Don't miss out on any of the fun... follow me on social media here.


If you are looking for more Valentine's Day inspiration, check out more than 30 Valentine's Day ideas here.

"Kiss" Countdown

Last year I made a "Hershey's Kiss" countdown to Valentine's Day for my boys.  It was a huge hit {which is not surprising given that it involved eating chocolate each morning}! This year, I decided to let them make their own, and here it is:


The boys started with a piece of foam core (from the dollar store), and I used hot glue to attach a "Kiss" sign (which I also got at the dollar store).  I printed some numbers from 1-14 on the computer, and they cut them out and glued them on.  Then, they added some foam letters and heart-shaped felt stickers.


To finish it off, I used double sided tape to add Hershey's kisses under each number.  I used three (one for each of my boys), but you can use any number.


Now we are ready for Valentines Day... and all the "kisses" that come with it!  ;-)

♥ 
Gina Bell (aka East Coast Mommy)

It's NOT about Perfection

I had such a great response to my I am NOT a Supermom post a couple of weeks ago, that I thought I would share something my six year old reminded me of last week:  It is fun to make crafts with kids, but it really doesn't matter how they turn out.


The other day, my son came up with a craft all on his own.  {See above.}  He asked me for the supplies he needed, and he went to work.  He was super-proud of the Valentine decoration he came up with.

Craft/projects don't have to be difficult or fancy.  The point of doing projects with kids is:  to spend time together and to let them be creative. 

I LOVE when my kids teach me important lessons.  :-)

♥ 
Gina Bell (aka East Coast Mommy)

Babyfood Jar Tealight Holders

These cute tealight holders are fun to make with the kids, and they use supplies right out of your recycling bin -- empty baby food jars.  My boys loved this activity because it is a little messy and involves using scissors and glue.  :-)


First, gather your supplies:  empty babyfood jars, tissue paper, a paintbrush, and glue.  (You'll need to thin out the glue to the consistency of paint -- approximately 3 tbsp glue for each 1 tbsp water.)


Then, follow these three simple steps:

Step 1:  Using the paintbrush, apply glue to a small section of the babyfood jar.


Step 2:  Cut tiny pieces of tissue paper, and apply to the area where you have just applied the glue.  (Keep applying glue and tissue paper until the entire jar is covered.)


Step 3:  Wait for the glue to dry, and then apply a coat over the top of the tissue paper.  (You can add a second top-coat if desired.)


That's it!  You can use a glue gun to attach a piece of ribbon or other embellishments, but this is totally optional.  

Remember to never leave a burning candle unattended... especially around children.  I intend to use some battery operated tealights I found at the dollar store.  Better safe than sorry!

♥ 
Gina Bell (aka East Coast Mommy)

Love Bugs

When I was a little girl, I remember making "Love Bugs" out of yarn, so I decided to make a similar craft with my boys. They are simple to make, and they are great for kids of all ages. How cute is this Yarn Love Bug for Valentine's Day?


Want to make one {or a bunch}?  Here's what you'll need:  yarn, an empty egg carton, googly eyes, pom poms, pipe cleaners, a scrap of cardboard, scissors, and beads {or other embellishments}.

Step 1:  Wrap yarn (approximately 60-100 times... depending on the thickness of the yarn) around a piece of cardboard (which should be approximately 3-4 inches high).  When you have finished wrapping, tie a piece of yarn tightly around the top of the wrapped yarn and cut the bottom.  (See picture below.)


Step 2:  Spread out the yarn, and glue it to the top of an egg carton.


Step 3:  This is when I got the boys involved.  I gave them the egg cartons covered in yarn, and let them decorate their "Love Bugs" any way they wanted to.  (I helped them add the pipe cleaner antennae because it was a bit tricky, but they did the rest themselves.) 


The boys added: beads (with their initials) to the antennae, googly eyes, pom pom noses, and pipe cleaner mouths.  So much fun!


I think they turned out really cute, and they are a perfect Valentine's Day craft for kids.  I hope you have fun making these adorable love bugs with your little "Sweethearts".

♥ 
Gina Bell (aka East Coast Mommy)

PS - You can find out how to make "Love Bug kits" to share with friends here. (Free printable instructions included.)


Don't miss any of the fun....